All Good Things Must Come To An End

And the next thing I know, 4 months of pastry school has come and gone. Did somebody fast forward my life because that sure as hell felt fast! Well, it's been quite the ride and I'm coming out of these 4 months feeling like I've been exposed to so much in the pastry world, yet, somehow I still lack confidence and feel like I have a truckload of things to learn and improve on. I suppose that's a good thing to feel, right? I'm actually glad that I'm not sauntering out of these 4 months thinking I'm the golden god of desserts. I'd have to slap myself in the face if so.

I started my 2 month externship at Tartine Bakery these last two weeks, and while I'd love to fill you in about that, you'll have to wait because you still haven't heard about the last 3 weeks of class! They were a memorable 3 weeks too so lets catch you up to speed shall we?

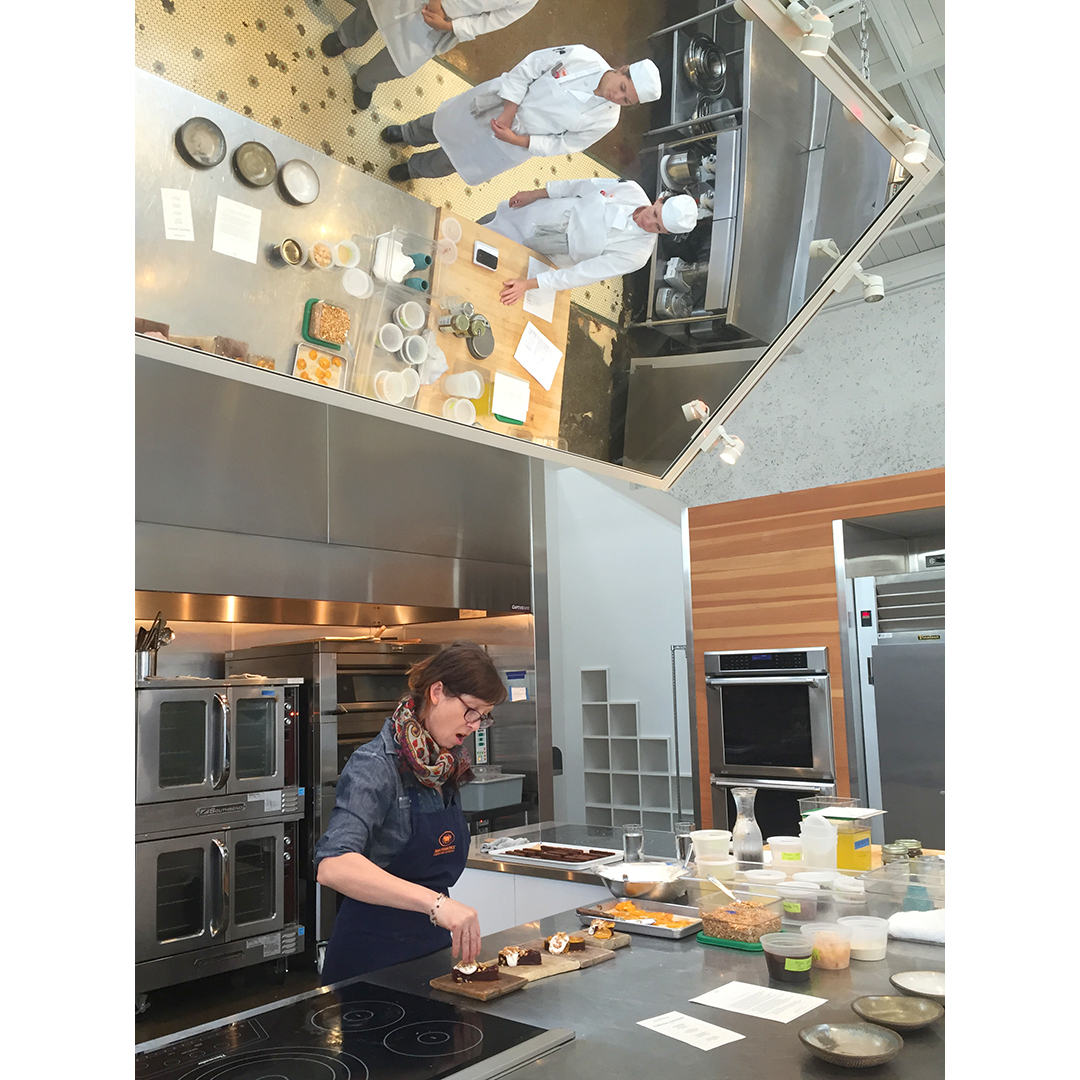
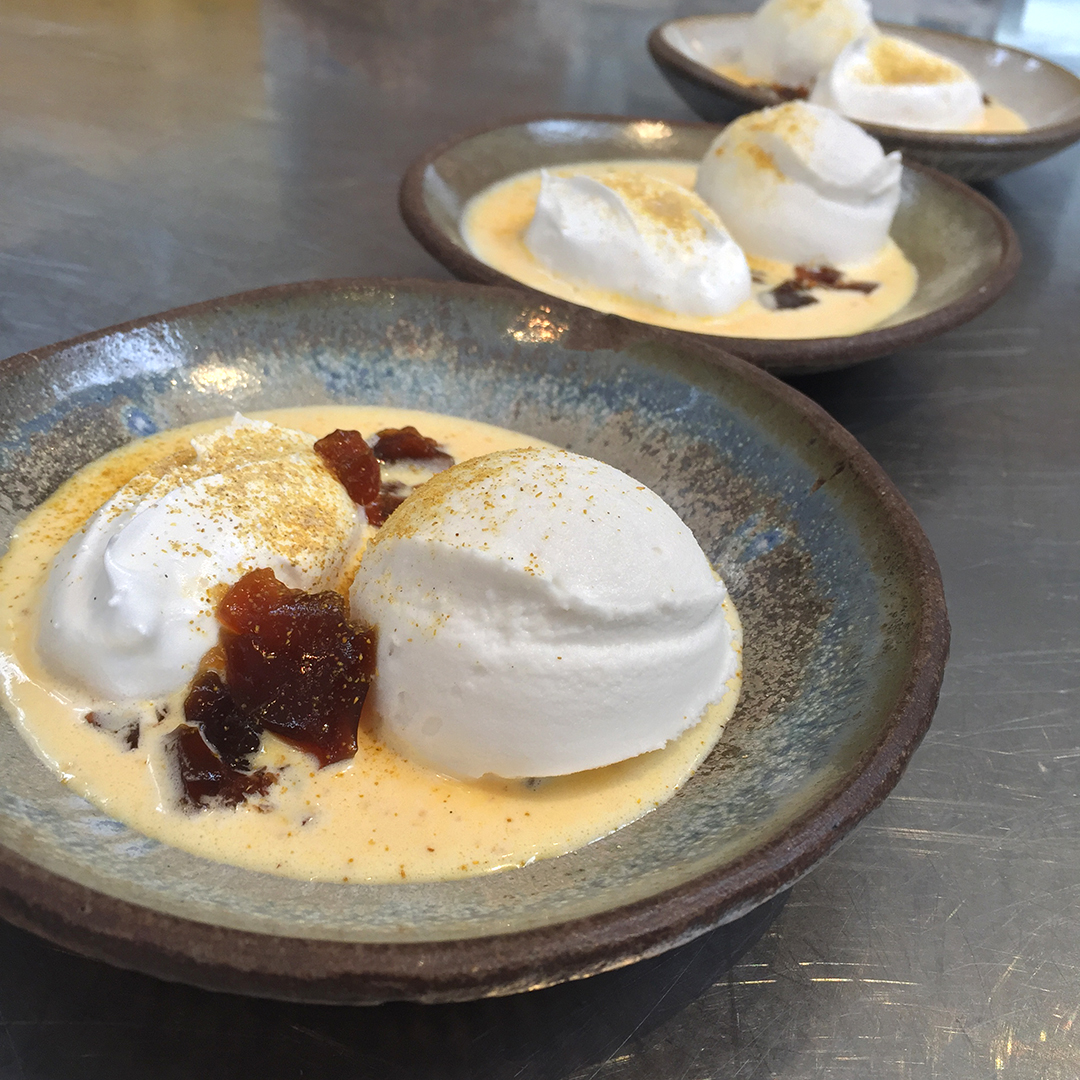
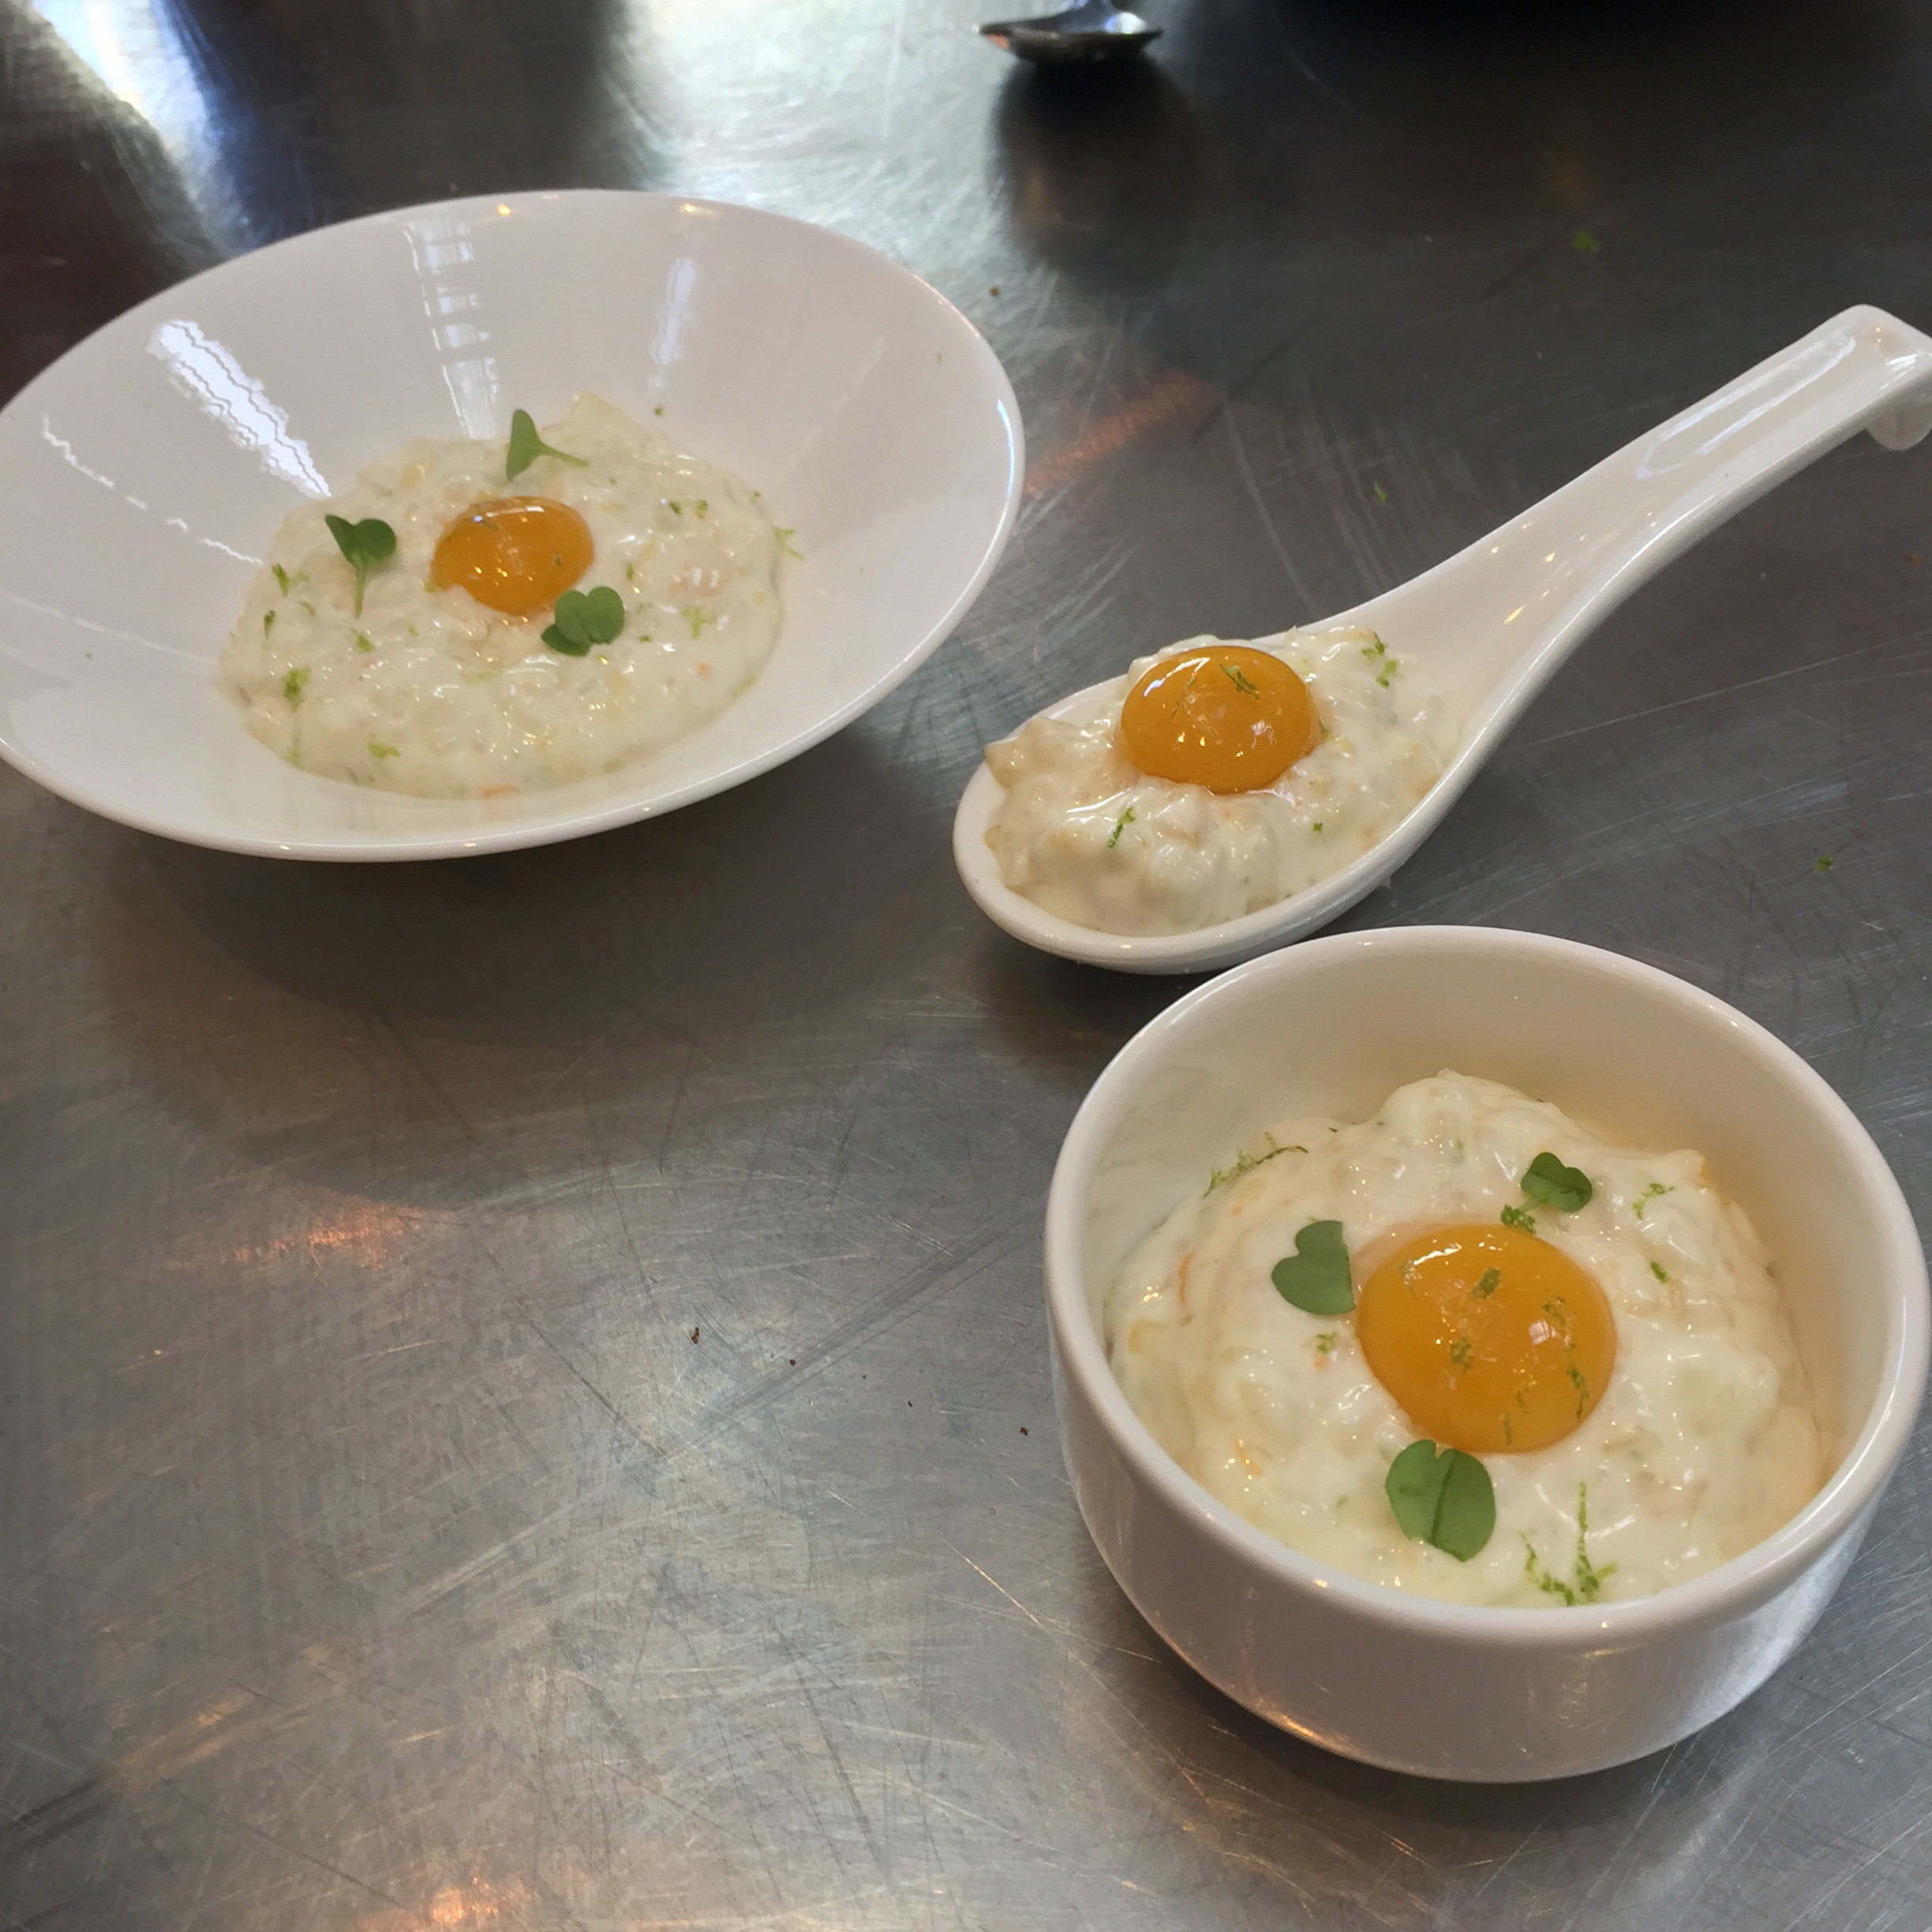
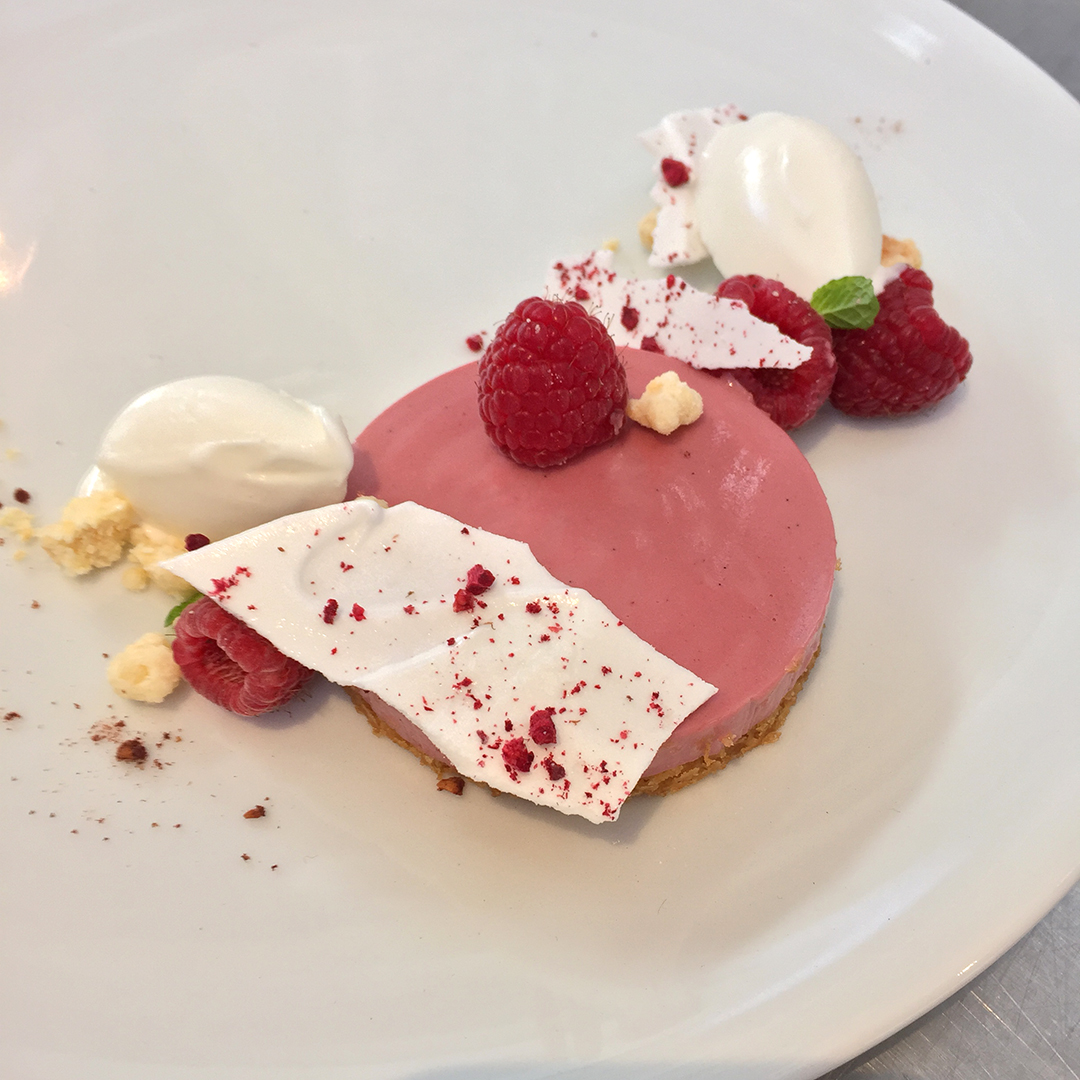
Week 14 - Plated Desserts
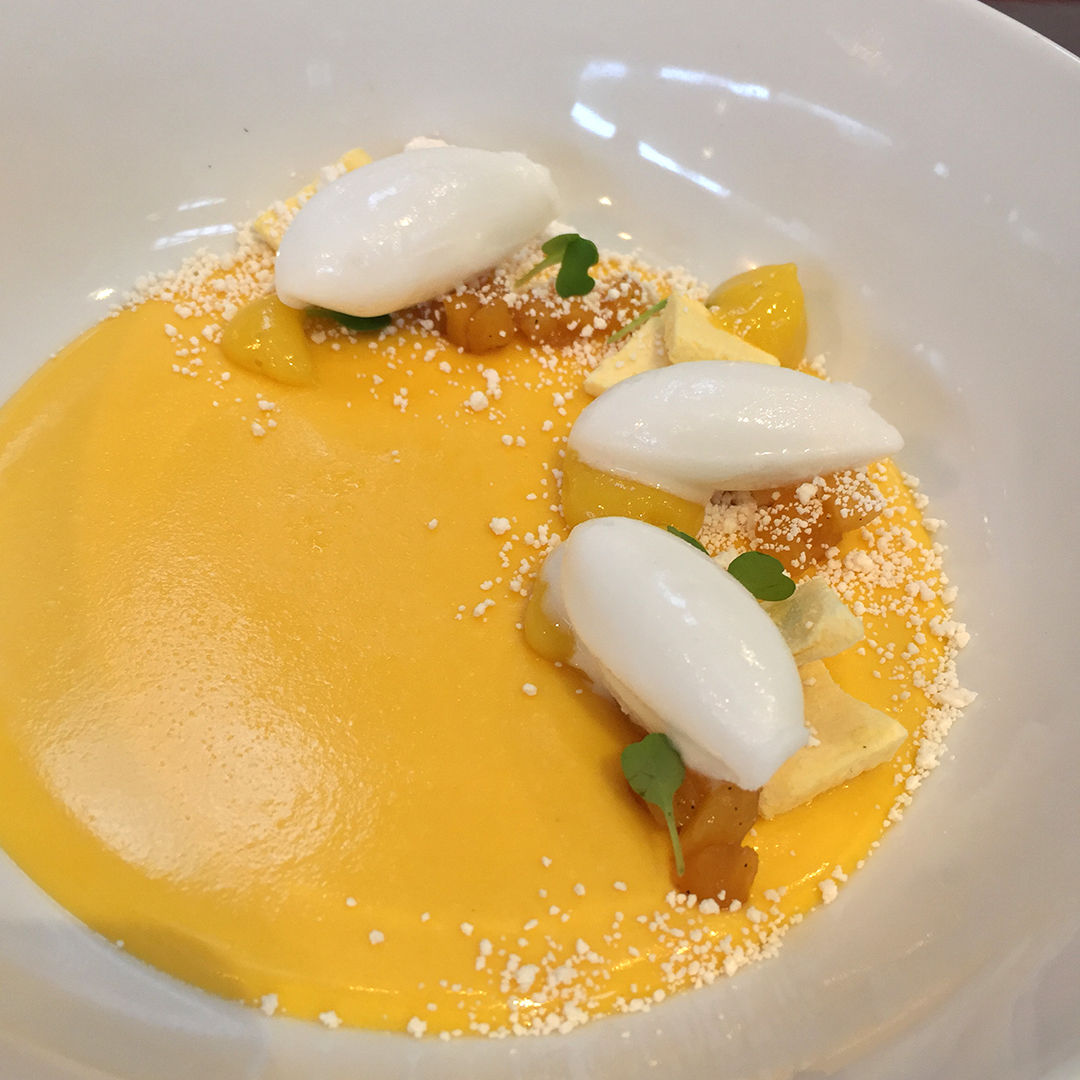
Ahhh a beautifully plated dessert. There's nothing more easy on the eyes than a beautifully plated dessert, other than a shirtless Ryan Reynolds of course (it's OK, my husband agrees that you can shred cheese on those abs). Plating dessert is a skill I wanted to improve on for awhile. Our chef showed us how to plate a variety of desserts; mashups that I would never think of putting together. We learned that plated desserts should have a balance of different tastes, textures and temperatures such as this killer dessert: Mango Custard with Roasted Pineapple, Coconut Sorbet, Coconut Snow, Kalamansi Gel and Micro Basil. We also learned that dessert should have the same style/size/vibe as the savory portion of the meal. Along with plated desserts, we had Nicole Krasinski, pastry chef/co-owner of the fantastic State Bird Provisions, pay us a visit to show us how to make a few of State Bird's desserts- SO so awesome. We ended the week with the fabulous Jeffrey Larsen, from our gluten-free workshop. Our final gluten-free project was due and Jeffery gave us some great feedback and critique on each of our desserts. My Peanut Butter Chocolate Chip Bars weren't bad, but they were nothing compared to my classmate's gluten-free Triple Ginger Cookies. She nailed it. If I were an Olympic judge, I would give it a perfect 10.

Week 15 - Bakery Day Prep/Bakery Day
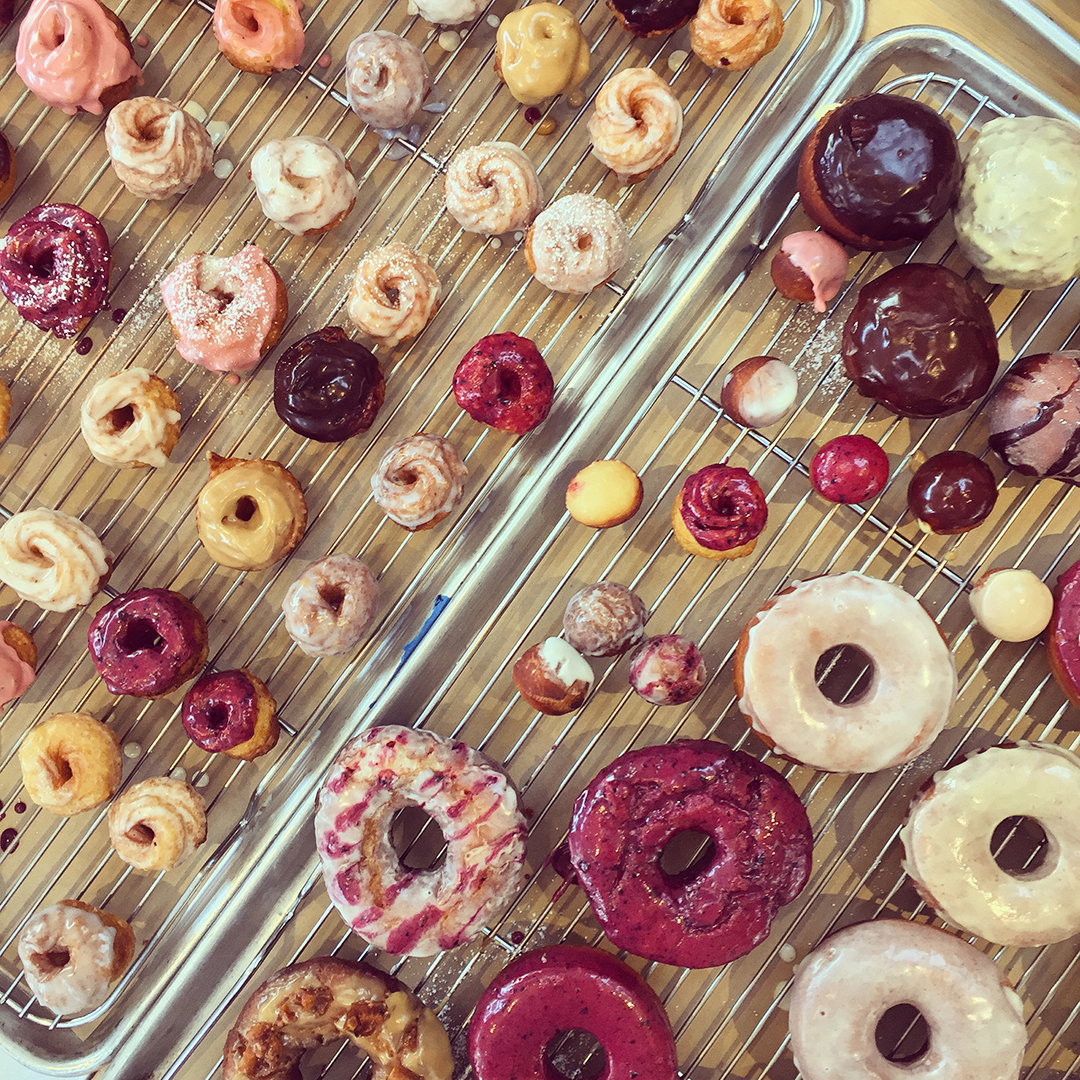
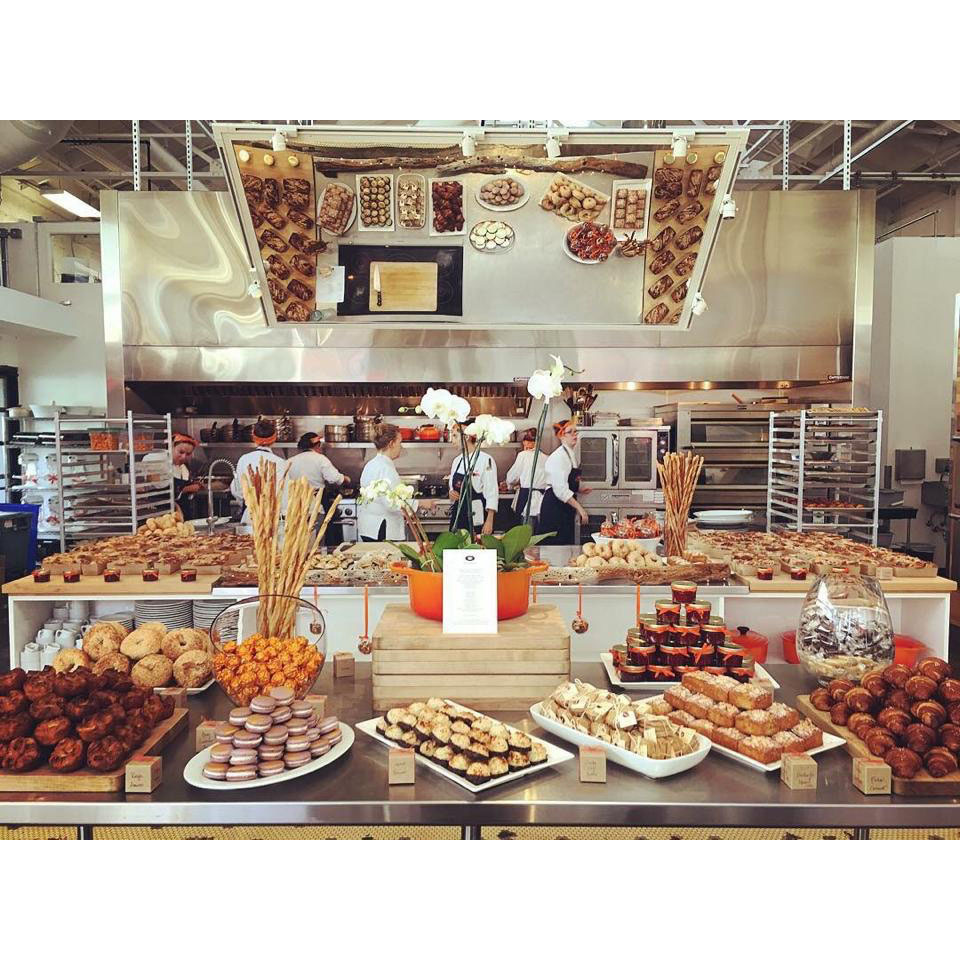
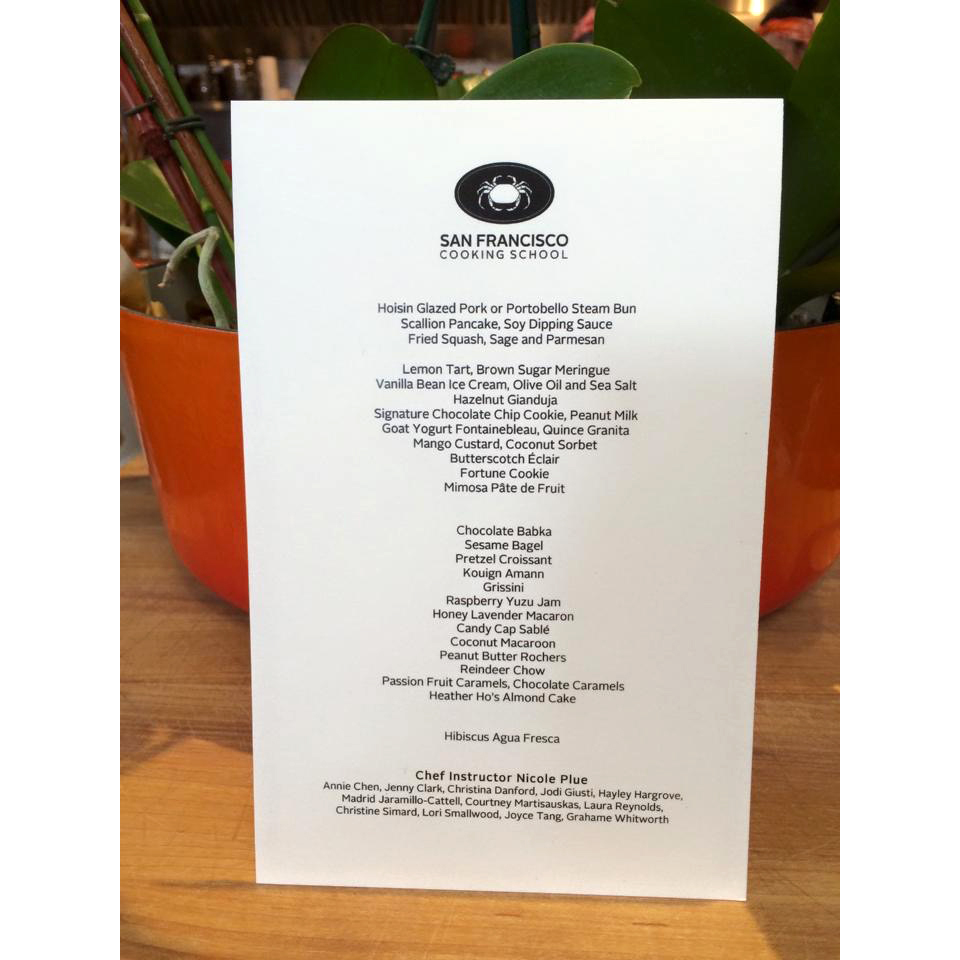
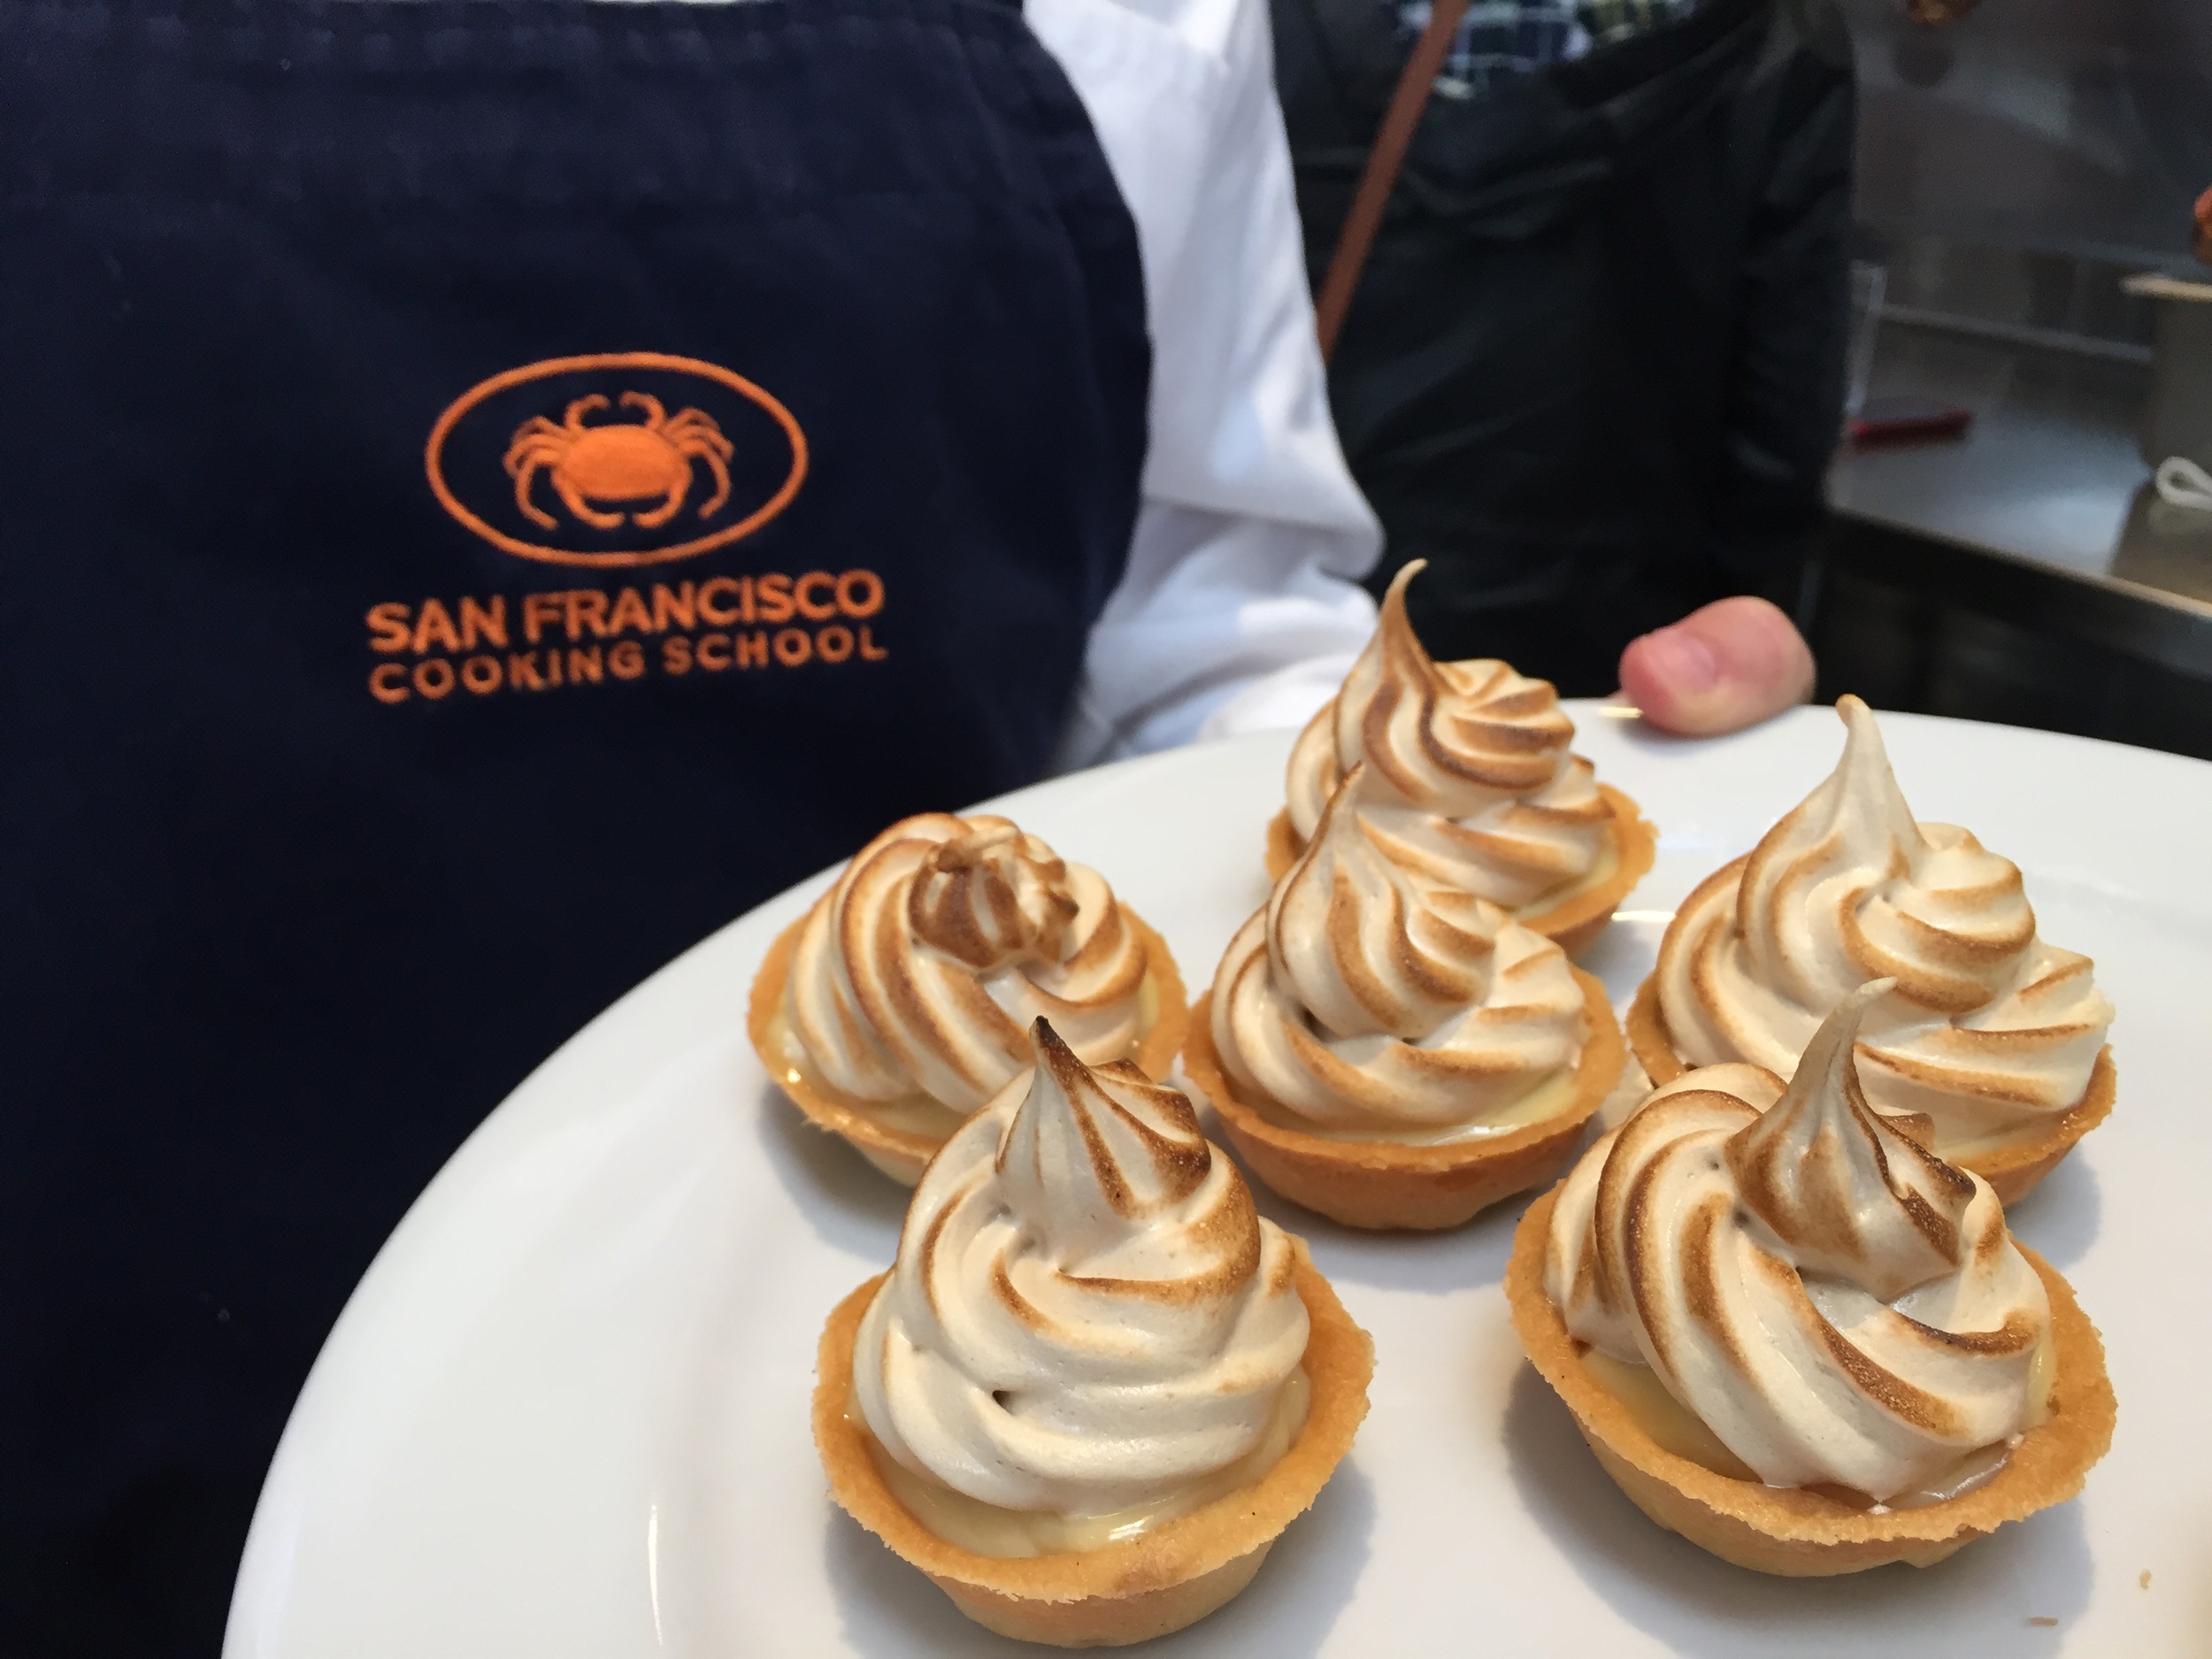
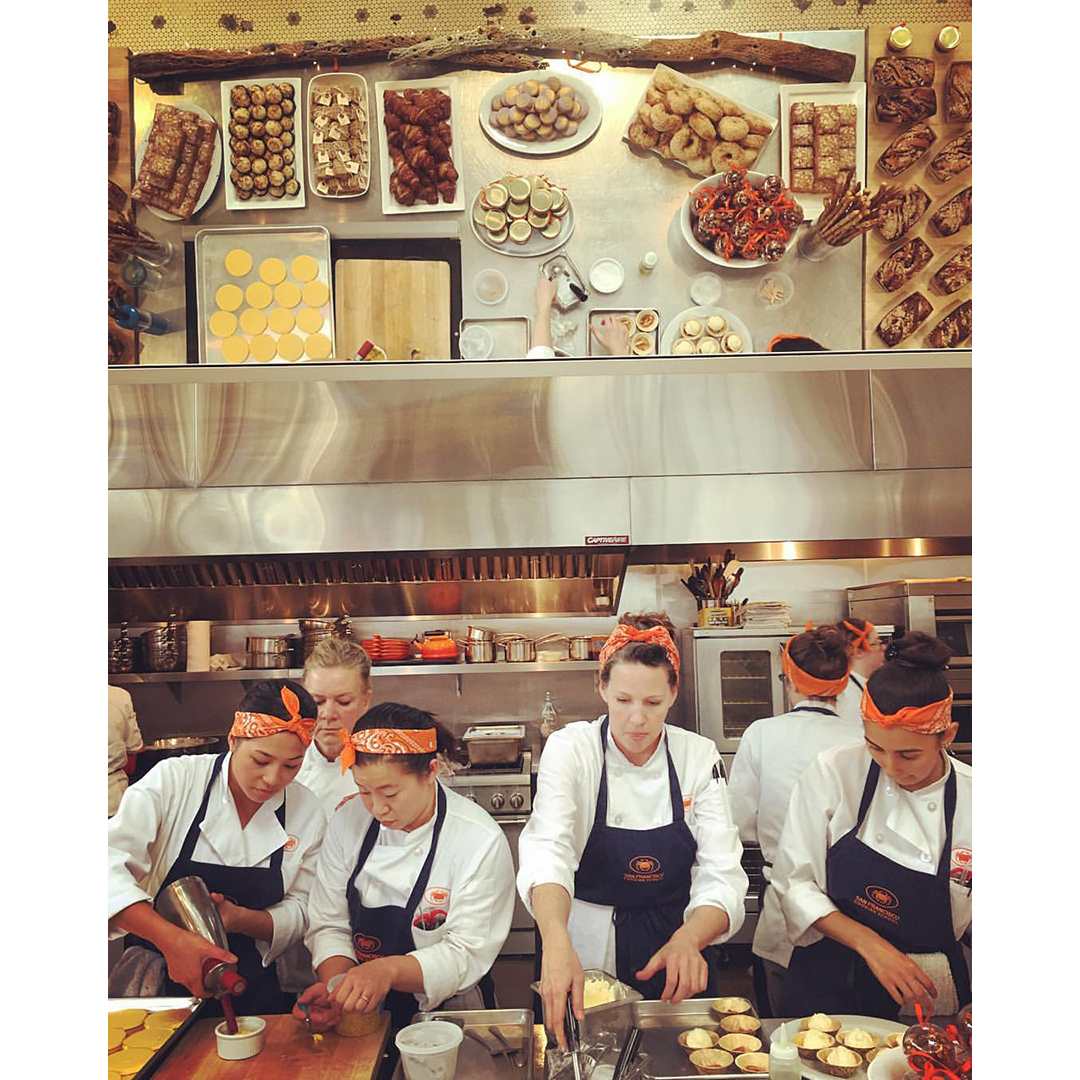
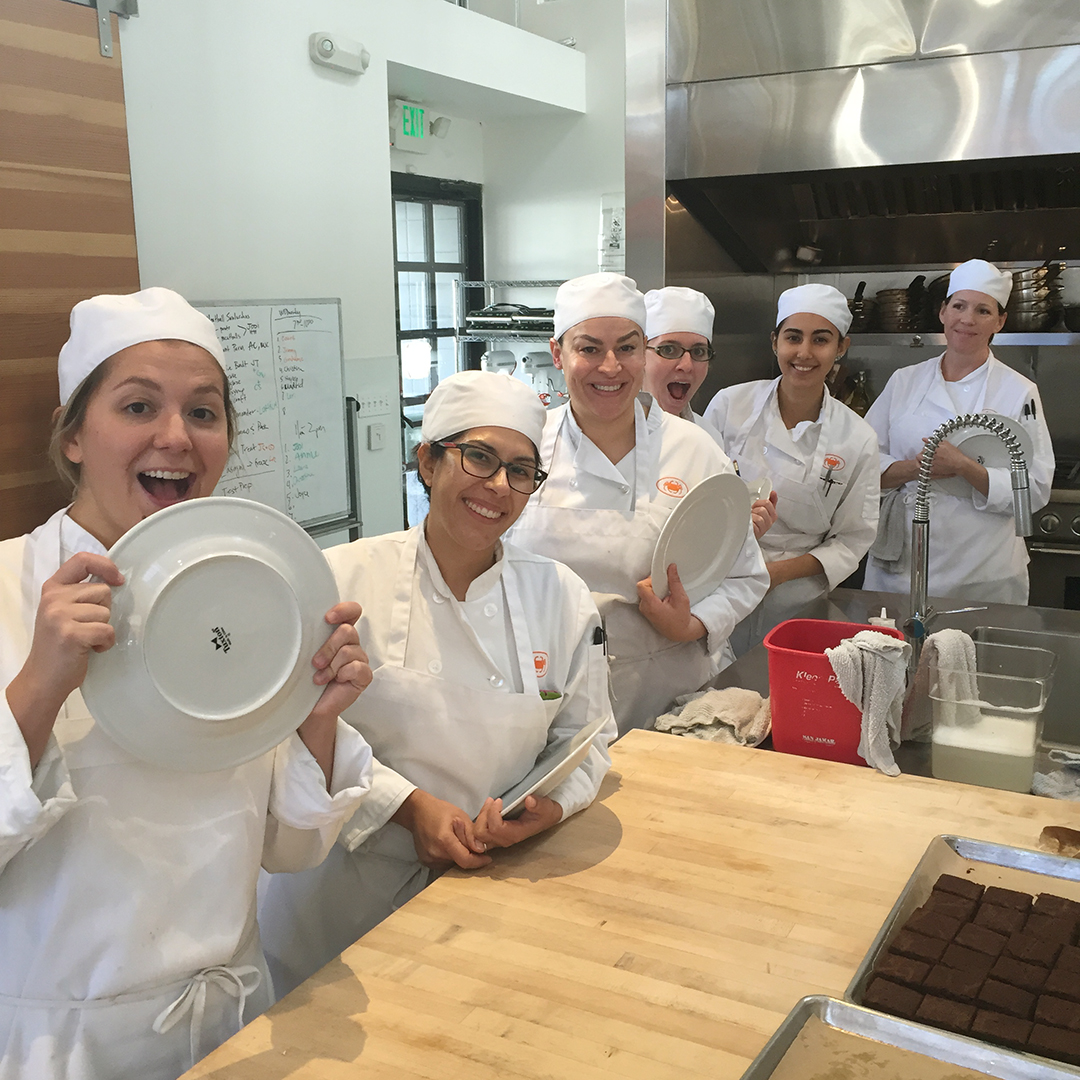
This week was all about prepping for our Bakery Day on Friday. Bakery Day was our final project where we got to invite a few friends/family to come to our school and be wined and dined on our behalf. We had a "pass" portion where we made/served food to them live and there was a "boxed" portion where they got to fill a box full of baked goods to take home that we made ahead of time. My classmates and I came up with these two menus together which took several rounds of narrowing down. Brutal cuts had to be made, such as any dessert involving peanut butter that I found only myself fighting for. I meannnn, who doesn't like peanut butter?! Sigh. So we came to a group consensus on the menus, each of us signed up for multiple items (mostly in teams) and planned out the to-dos for each day. My items were: Passion Fruit Caramels, Chocolate Caramels, Honey Lavender Macarons and Scallion Pancakes with Soy Dipping Sauce. My teammates and I banged out the caramels and pancakes, which had essentially no hiccups, but man oh man did the macarons ever. Those mac-attacks were real assholes. Firstly, they are labor-intensive to make, secondly, they just didn't want to cooperate. Long story short, we ended up having to make 4 batches until we got it right. Luckily in the end, they tasted good and looked pretty enough. Pro Tip: A topper of edible gold paint can take your macaron game from a 5 to a 9.

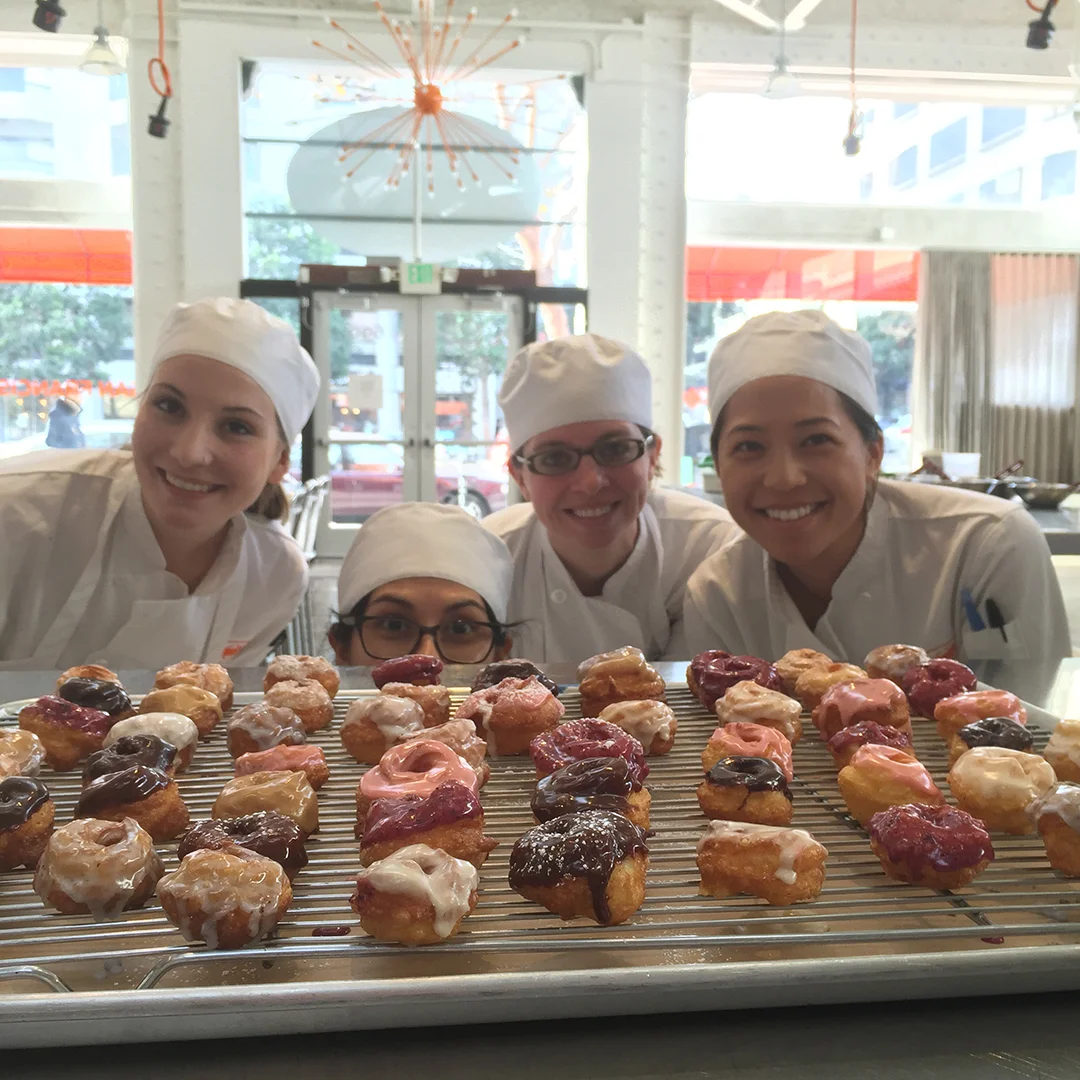
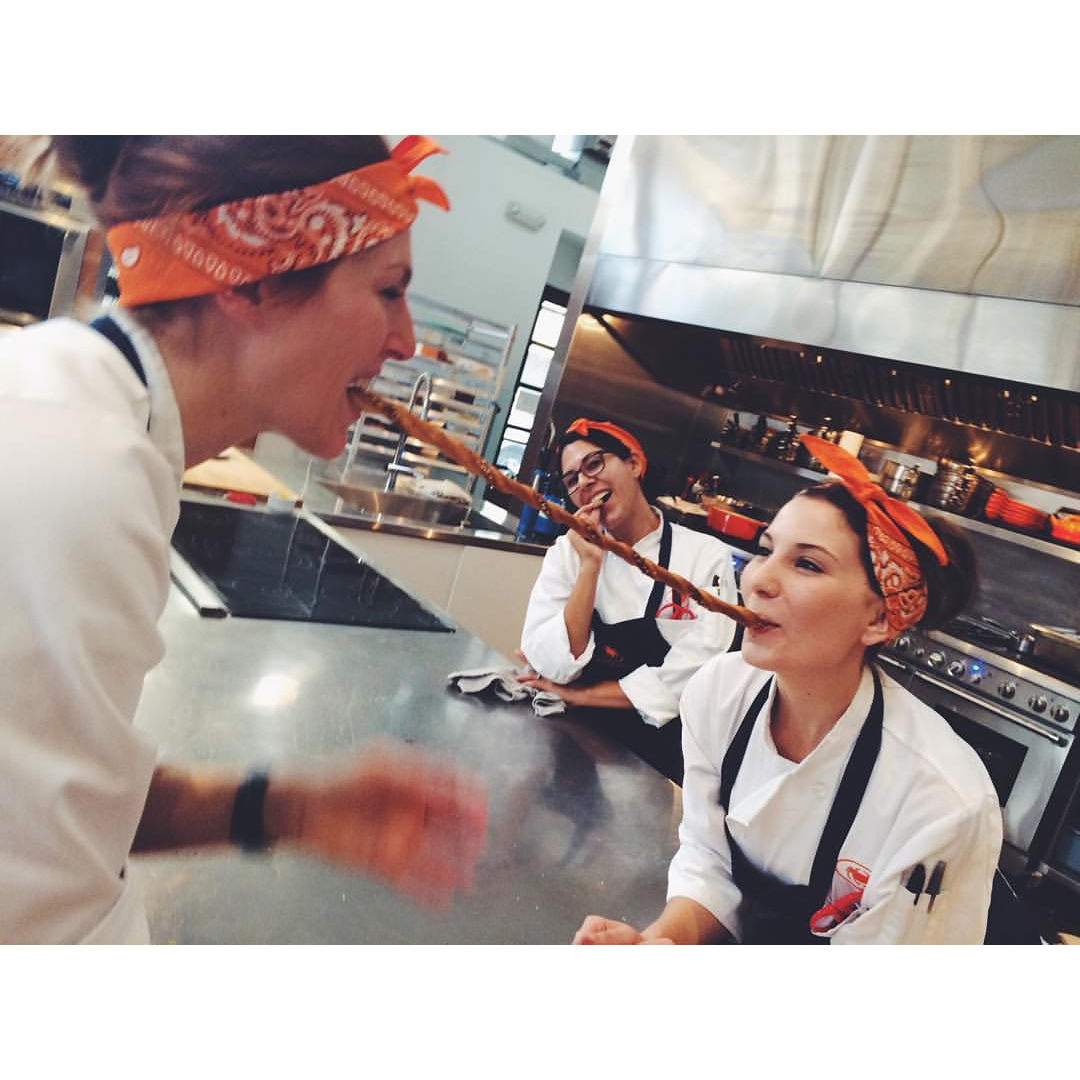
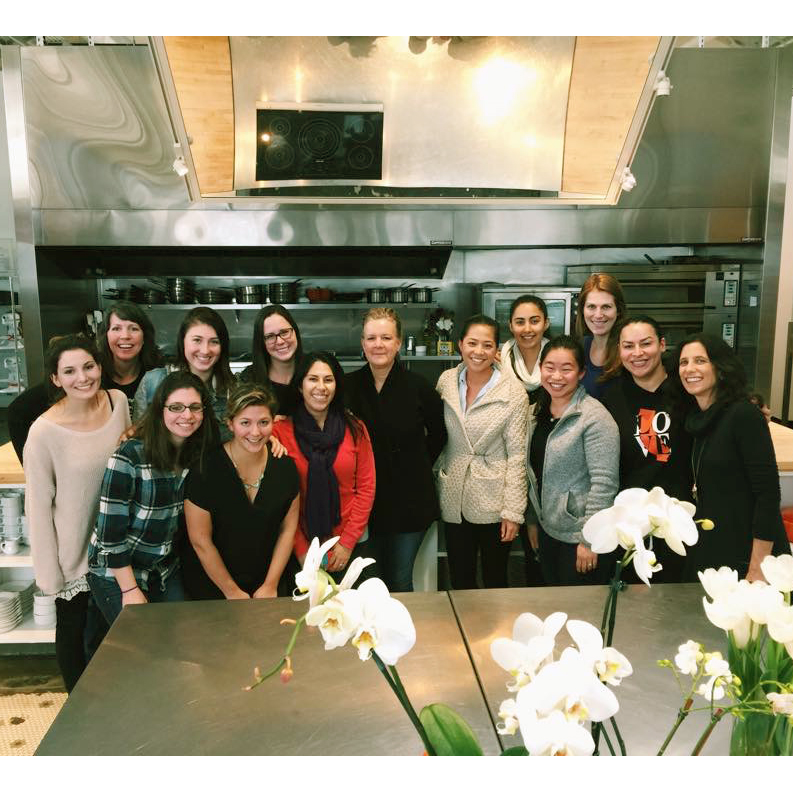
Bakery Day overall was a blast. We all wore orange bandannas which made us look like a cross between 2Pac and Rosie the Riveter, but we still looked cute in my humble. Shrug. All of our hard work leading to this day paid off- the decor and setup looked beautiful and professional, the kitchen crew killed it and the front of house foursome (myself included) made sure our guests were well fed and happy. It was so fun getting to meet all my classmates' people and see/hear how everyone was liking the food. It felt like a huge accomplishment and even though we could have improved on a few things, I was super proud of all of us. #goteam

Week 16 - Final exams & Field Trips
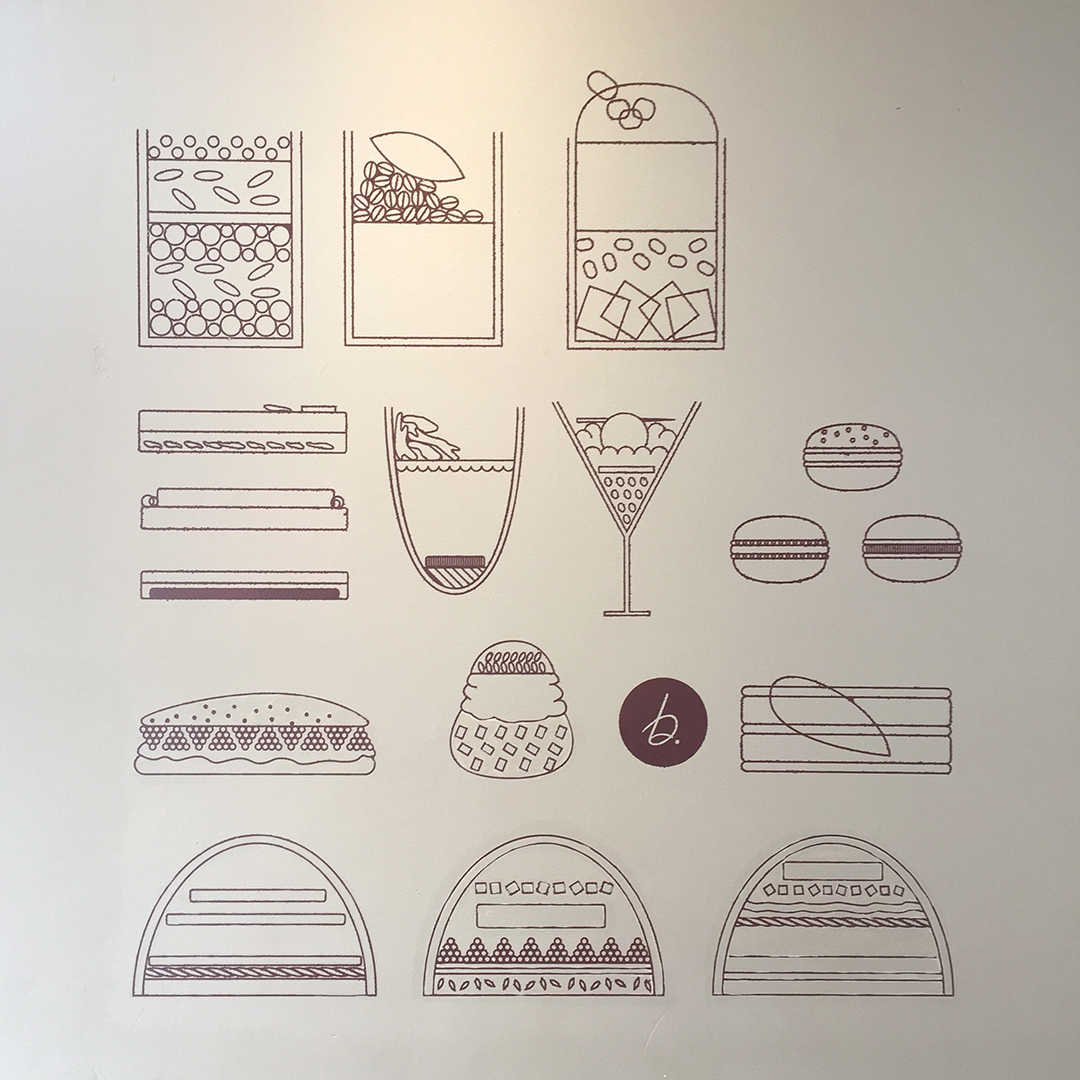
This week was a blend of low-key field trips and high stress test days - great fun for your blood pressure. Our field trips were to Williams-Sonoma Test Kitchen, Guittard Chocolate and B. Patisserie. We started things off at good 'ol Williams-Sonoma! It brought me back to my old catalog life as I walked through the doors. It was such fun seeing this famous test kitchen in person. Fun Fact: The test kitchen ladies are the ones who judged the Chuck Williams Birthday Bake-Off (RIP Chuck) that I fatley lost in a few years ago. These ladies have a stellar gig: they get to test recipes for future catalogs. Hello dream-job. At Guittard, we got a grand tour of their facilities and got to see how they make their delicious chocolate - they are one hell of a well-oiled machine! We closed out the field trips at B. Patisserie where they make some of the best pastries I've ever had (their Kouign Amann is insane!) Eating their pastries would have been a fun field-trip in itself, but we got a chance to have B's kick-ass pastry chef, Belinda Leong, talk to us about her background and tell us her B. Patisserie story. Our last day at school was spent being fed by the lovely Culinary Arts class for their final project: Restaurant Day. They did a FANtastic job, to put it lightly.

The class portion of school is over, but all good things must come to an end. Now, I'm in the land of Tartine Bakery and that ain't bad. ;-)

Lets bring it on home with a photo montage from these 3 weeks! Cue song. Sidenote: I had never seen this music video before. Hello glam rock at it's finest. Cheers!

Recipe: Raspberry Crumb Bars

Myself and two other bakers are signed up to do desserts for my friend's wedding next month. With our baker powers combined we will serve up one hell of a dessert bar. One baker is making the groom's cake/bride's cake (yeah Amy!), the other baker is making a gluten-free dessert and I'm making a grip of cookies and bars. The groom wanted anything peanut butter chocolate (my people) and the bride wanted a fruity number. These delectable Raspberry Crumb Bars may be just the ticket for the bride's dessert.

This recipe slightly cuts a corner by using store-bought raspberry jam, but I'm cool with that. Especially when I need to make 40 of these puppies! Be sure to leave enough time before making these because the dough needs to sit for 30-60 mins. Boo, I know, but it's for good reason.

Now go kick off the weekend with a razzie crumb bar in your face!

Raspberry Crumb Bars
Yield: 10-12 bars
Recipe from Flour by Joanne Cheng

Ingredients
1 1/2 cups (3 sticks/342 grams) unsalted butter
1/2 cup (100 grams) granulated sugar
3 tbsp confectioners' sugar
2 egg yolks
1 tsp vanilla extract
1 1/4 cups (175 grams) unbleached all-purpose flour
1 1/2 cups (180 grams) cake flour
3/4 tsp baking powder
3/4 tsp kosher salt
1 1/2 cups (510 grams) raspberry jam (with seeds). Bonne Maman jam is my personal favorite.
1/4 cup (35 grams) confectioners' sugar (optional)

Directions
1.  Using a stand mixer fitted with the paddle attachment, cream together the butter, granulated sugar, and confectioners' sugar on medium speed for about 5 minutes, or until the mixture is light and fluffy. Stop the mixer a few times to scrape down the bowl and paddle. Beat in the egg yolks and vanilla on medium speed for 2-3 minutes, or until thoroughly combined. Scrape down the bowl and paddle again.
2.  In a medium bowl, sift or whisk together the all-purpose flour, cake flour, baking powder, and salt. On low speed, gradually add the flour mixture to the butter-sugar mixture and then mix for about 15 seconds, or until the flour mixture is totally incorporated and the dough is evenly mixed. Scrape down the bowl again and make sure all of the flour mixture is thoroughly incorporated.
3.  Scrape the dough onto a sheet of plastic wrap. Remove one-fourth of the dough to a separate sheet of plastic wrap. Wrap the remaining three-fourths of the dough entirely in the plastic wrap, pressing down to form a disk about 8 inches in diameter and 1 inch thick. Refrigerate the dough disk for about 30 minutes, or until the dough has firmed up but is still somewhat pliable. Pat the reserved one-fourth of the dough into a small disk, wrap in the plastic wrap, and place in the freezer for at least 2 hours, or until hard.
4.  Position a rack in the center of the oven and preheat the oven to 350 degrees F.
5.  Lightly flour the 8-inch dough disk and two large sheets of parchment paper. Place the dough between the sheets of parchment, and roll it out into a rectangle about 13 by 9 inches and 1/4 to 1/3-inch thick. Carefully peel off the top sheet of parchment. Trim the edges so the rectangle has fairly neat sides. Transfer the bottom sheet of parchment with the dough to a baking sheet. Trim the parchment paper so that it fits the baking sheet.
6.  Bake for about 20 minutes, or until the shortbread is light brown. Remove the shortbread from the oven (leaving the oven set at 350 degrees F), let cool for 10-15 minutes, and then spoon the raspberry jam on top of the still-warm shortbread. Spread it in an even layer with the spoon or with a rubber spatula, covering the surface. The heat of the shortbread should soften the jam enough to make it spreadable.
7.  Remove the smaller dough disk from the freezer and, using the large holes on a box grater, grate it into large flakes and evenly sprinkle over the jam. (I found it easier to grate the dough flakes right over the jam because otherwise they softened and clumped together, making them impossible to "sprinkle.")
8.  Return the baking sheet to the oven and bake for another 20-25 minutes, or until the top is lightly browned. Let cool completely on the baking sheet on a wire rack.
9.  When cooled, sift the confectioners' sugar evenly over the top. Trim the edges again, then cut into bars.

Good to know:
•The bars can be stored in an airtight container at room temperature for up to 5 days.
•Pre-baking, the smaller dough portion can be stored in the freezer for up to 1 month. The larger dough disk can be stored in the refrigerator for up to 5 days or in the freezer for up to 1 month. If the larger dough disk is frozen, thaw it overnight in the refrigerator, then let it sit at room temperature for about 20 minutes before using

Hey Guess What?

It's been crickets at Dessert Fiend, and here's why...I'M GOING TO PASTRY SCHOOL! Over the past month, I've been fully consumed in this venture. Excited? Heck yes. Nervous? Double heck yes.

Ever since I left my job at Williams-Sonoma, I've been not only thoroughly enjoying the free time, and then some, but I've also been trying to figure out what I want to be when I grow up. I became stuck trying to answer that question, until a month ago, when I had a Dr. House epiphany.

You know when you have those overwhelming euphoric "clouds are parting" moments if life? Well, I don't really have those moments, except when it comes to food. It's magical. This kind of moment and epiphany happened when I was at one of my happy places: Tartine Bakery. As I waited in line, I had this profound itch to know what was happening on the other side of this bakery of the gods, behind the scenes if you will. It didn't look like a cake walk in the kitchen <no pun intended>, but I wanted to be involved in the action, badly, and wondered if and how and when I could make this happen. Wheels: turning.

The next thing I knew, I was Googling pastry schools that following week. I realized that going to school to learn all I can about one of my favorite subjects felt like the exact step I should be taking. After extensive research, I found a school that sounded just right: San Francisco Cooking School. That name doesn't fool around- it means what it says and says what it means. Days later, I had a fantastic phone conversation with the founder of the school and the more I heard about the program, the more I wanted to be a part of it. The following week, I went to their open house with my application in hand. I was sold. The space is seriously gorgeous (hello dream kitchen!) and their signature color happens to be orange (like my hair!) Meant to be I tell ya. I excitedly walked out of the open house with a bounce in my step. A few weeks later, I got the good news that I had been accepted into the fall program at SFCS. I was grinning like an idiot and actually teared up a bit out of excitement and relief.

So that's my little story friends. Dessert Fiend is going to pastry school! I know it's going to be A LOT of hard work and long hours, but if the outcome means I get to bake desserts that make people happy, then game on. MANY more posts to come as I embark on this journey <picture me on a row boat paddling my way down a chocolate milk river, a la Willy Wonka and The Chocolate Factory>.

2015 Dessert Resolution & Reviewing The Mill’s Toast

If I were to make a 2015 dessert resolution, I can firstly tell ya that it wouldn’t be to make a crapload of tarts, which was essentially my dessert resolution from last year. If you’re wondering, I only made 3 tarts...here's to trying again. This year I've decided to give this DR another go, but this time I'm going much broader with it: to review more desserts. I’d like to see what the world has to offer my belly. 

As y’all know, this blog developed from my deep love for dessert. It’s not just the fact that I enjoy baking, which I truly do, but it’s mostly because I just simply love eating dessert. Always. At anytime. If you woke me up at 3am with a cheesecake inches from my face, I'd be delighted. So, I’d like to try exploring what’s out there, but also continue baking and chatting about dessert nonsense, obvi. 

To start my reviews off, this morning I jaunted to one of my neighborhood coffee shops, The Mill, for a cup of Joe and to try a slice of their $3.50 hipster toast. The Mill makes their own bread (props) but this is the first time I sampled their toast- I had to see what this toast fuss was about. Toast has become very much a thing in SF and places like this sell it like hot cakes (read about the history of toast here). The Mill has a legit toast menu and I wanted to try the piece that comes slathered with homemade Nutella, but sadly some selfish yammos ate all of it and they were sold out. Humph. I went with my second choice which was, essentially cinnamon/sugar toast...$3.50 cinnamon/sugar toast. So, I sat down with my hipster coffee and hipster toast, snapped a hipster photo of my situation (which I planned to filter the shit out of later) and took a bite of my 1 inch thick slab o' toast. Thoughts? I'd be a liar if I said it wasn't tasty because it really was. Crunchy, warm, buttery and of course cinnamon-sugary. I appreciated that they didn’t skimp on the butter and the cinnamon/sugar layer. This toast also brought me back to my youth because I used to make cinnamon/sugar toast all the time as a dessertsnack. So, overall, The Mill did a solid job with this toast, I admit, but is it really worth the $3.50? Hells no. Will I come back to try their homemade Nutella on toast? Hells yes. Let's be honest, I've spent more on a beer before so I won't judge toast connoisseurs. 

As far as this toast phenomenon goes, if you feel inclined to dabble in a piece, give me a shout and I’ll gladly meet you at The Mill for a round o’ toast.

Overall Rating: 4/5 tartlets

Victorious Pumpkin Cheesecake

It's been quite a December for me. A bit coo coo ca choo if you will. I decided to part ways with the lovely Williams-Sonoma, a company I had been working at for over 8 years! Major WOAH, right? During my last week there, I felt like a chicken with it's head cut off. While I was wrapping up my work to dos and fully utilizing my corporate discount (why of course I need a Snowflake Cakelet Pan and a couple Spoonulas), the company had another baking contest for all the Pottery Barn brand teams. This was my last shot at partaking in a work baking contest, so I couldn't not enter, ego shot from the last failed contest or not! I discussed dessert ideas with a coworker and she brought up the idea of making a pumpkin cheesecake, mostly because it's a favorite of hers (smart girl). I'm a big fan of this dessert as well and I've had experience making it a few times so this plan was fully a go! I knew I had to use my "crack cheesecake crust" (the name I lovingly gave to Momufuku's Milk Bar's Graham Cracker Crust because it's rightfully addicting), and I wanted to try out a new pumpkin cheesecake recipe I've been eyeing. It's a dicey move to make something new for a contest, i know, but I felt like I needed to go balls out for this last one.

As I've mentioned, cheesecake takes for evs to cook- I'm talking hours upon hours upon hours. You've got your baking time, cooling time and more cooling time that adds up to about 11 hours. It's insane, but strangely always worth it in the end. So, I tackled this recipe the night before the contest, but made the mistake of starting rather late. Not wise. That meant I had to set several alarms to wake my ass up to tend to the cheesecake. Alarm #1: turn oven off after cheesecake had baked for almost 2 hours. Alarm #2: take cheesecake out of oven after it had sat in oven for 1 hour, put on cooling rack. Alarm #3: put cheesecake in fridge to cool for 8+ hours.

Like I said, it's strangely worth all the hassle in the end, and this time was luckily no different, when it really mattered. Friends, I placed in the contest! And by "placed," I mean I got 3rd place. Yes, it's not the gold or silver, but it's bronze friends and it's a beautiful metal to me. This win was the perfect ending to my career at Williams-Sonoma. 

As I walked out the door of my beloved workplace for the last time, I tucked the empty cheesecake pan under my arm, still wearing a satisfied victory grin. Special shoutout to Mr. Williams and my fabulous work peeps- hugs all around!

Victorious Pumpkin Cheesecake
Yield: Roughly 12 servings, but it depends on how generous you are with your slices.
Crust Recipe from Momofuku Milk Bar
Filling Recipe from Foodnetwork.com

Ingredients – Crust
Yield
: Makes about 340 g (2 Cups)
Note: if you want a thicker crust, double this recipe! I did.
190 g (1 1/2 cups) graham cracker crumbs
20 g (1/4 cup) milk powder
25 g (2 tbs) sugar
3 g (3/4 tsp) kosher salt
55 g (4 tbs) butter, melted, or as needed
55 g (1/4 cup) heavy cream

Ingredients – Filling
2 pounds cream cheese, at room temperature
2 1/2 cups sugar
1/4 cup sour cream
1, 15 -ounce can pure pumpkin
6 large eggs, at room temperature, lightly beaten
1 tablespoon vanilla extract
2 1/2 teaspoons ground cinnamon
1 teaspoon ground ginger
1/4 teaspoon ground cloves
2 cups sweetened whipped cream
1/3 cup toasted pecans, roughly chopped

Directions – Crust
1.  
Preheat over to 325 degrees Fahrenheit.
2.  Brush a 10-inch springform pan with some melted butter.
3.  Toss the graham crumbs, milk powder, sugar, and salt with your hands in a medium bowl to evenly distribute your dry ingredients.
4.  Whisk the butter and heavy cream together. Add to the dry ingredients and toss again to evenly distribute. The butter will act as glue, adhering to the dry ingredients and turning the mixture into a bunch of small clusters. The mixture should hold its shape if squeezed tightly in the palm of your hand. If it is not moist enough to do so, melt an additional 14 to 25 g (1 to 1½ table- spoons) butter and mix it in.
5.  Press the crumb mixture into the bottom and up the sides of the pan, packing it tightly and evenly (Pro Tip: OR do what I did and just spread a thick layer on the bottom). Bake until golden brown, 15 to 20 minutes.
6.  Cool on a rack, then wrap the outside of the springform pan with foil or slow cooker liners (these are fool-proof!) and place in a roasting pan or a larger pan.

Directions – Filling
1.  Boil a kettle of water to have ready for your water bath.
2.  Toast your pecans at 375 degrees until you can barely start to smell them (5ish mins), set aside to cool.
3.  Lower oven temperature to 325 degrees.
4.  In a larger bowl or stand mixer, beat the cream cheese until smooth. Add sugar and beat until just light, scraping down the sides of the bowl and beaters as needed. Beat in the sour cream, then add the pumpkin, eggs, vanilla, 1 teaspoon salt and the spices and beat until just combined. Pour into the cooled crust.
5.  Gently place a roasting pan (or any pan that is larger than your springform pan) in the oven (don't pull the rack out) and pour the boiling water into the roasting pan until it comes about halfway up the side of the springform pan.
6.  Bake at 325 degrees until the outside of the cheesecake sets but the center is still loose, about 1 hour 45 minutes. Turn off the oven and open the door briefly to let out some heat. Leave the cheesecake in the oven for 1 more hour, then carefully remove from the roasting pan and cool on a rack. Run a knife around the edges, cover and refrigerate at least 8 hours or overnight.
7.  Bring the cheesecake to room temperature 30 minutes before serving. Unlock and remove the springform ring. To finish, place a dollop of the whipped cream on each slice and sprinkle with the toasted pecans.

Chuck Williams' Birthday Bake Off

image courtesy of Williams-Sonoma Inc.

Chuck Williams, the founder of Williams-Sonoma (where I work), turned 99 on October 2! Having a 99th burfday is no joke, so in light of this, the company decided to turn it up to 11 and spread his birthday celebration over 7 days. On one of the last days, they hosted a Chuck Williams Birthday Bake-Off, where any associate could enter. There was no question about whether or not I should compete. It would be a nasty slap to the face of this blog if I didn't enter...not to mention there were handsome prizes for the winners:

  • A KitchenAid Stand Mixer 
  • Williams-Sonoma Goldtouch bakeware and an electric hand mixer 
  • 7-piece Wüstof Classic Ikon knife block set 
  • Set of three Le Creuset cookware

Nice little line-up, eh? I was excited to get my baking on for Chucky-boy (he probably wouldn't like me calling him that). There were four categories for the contest: Best Tasting, Best Presentation, Most Creative; and Best Use of Chuck's Finds. To be honest, I didn't target any of the categories and instead chose desserts I have previously made that stood out in my mind. The rules stated that competitors could enter multiple desserts so I knew I'd at least enter a few to increase my chances of placing. I decided on these two crowd pleasers: Chocolate Guinness Cupcakes with Bailey's Buttercream Frosting and Banana Pudding with Salted Caramel Sauce. I thought these provided enough differences from the other but were still equally yumtastic.

I felt confident enough about my decision, until I arrived at the bake-off. While I excitedly set up my two delights, I immediately sized-up my competition. There were 32 desserts there, some looking rather average (sorry) and some looking pretty impressive. I gazed at my dessert friends one last time, gave them a good luck nod and headed back to work. After getting into the office, I quickly realized I wouldn't be able to make the actual bake-off due to <insert something important sounding that really isn't as important as the bake-off in my humble>. I was a sad panda, but whatareyougonnado?

One of the judges judging my pretties

One of the judges judging my pretties

I wasn't able to get any information about the bake-off until the following day. I was eager to hear how it went and who took the gold, all while trying to keep my expectations low. An email finally went out with the lowdown. Williams-Sonoma Test Kitchen chefs were the judges and apparently, Chuck Williams (in-the-flesh!) attended the bake-off as well at Tyler Florence. Whaaaa?! Amazing, right? The results weren't great for the Dessert Fiend though. I sadly didn't even place <insert frowny emoticon>, but here are the list of winners, in all their glory:

Most Creative:
Winner: Bannoffee Pie
RU: Yogurt Cheesecake with Passion Fruit Topping

Best Presentation:
Winner: Almond Buttercream with Meyer Lemon Curd
RU: Pavlova

Best Use of Chuck’s Finds:
Winner: Chocolate Hazelnut Crepe Cake
RU: Chuck’s Tool Belt

Most Delicious:
Winner: Hazelnut Mocha Daquoise
RU: Almond Cake with Chocolate Mousse

There is, however, a big silver lining to my loss: the Bake-Off was featured on our company website and this very blog got a SWEET plug! Dessert Fiend will take a pimpin' wherever she can. Also, apparently my cupcakes were the talk of the town and several people wanted my recipe. At least I'm a winner in somebody's eyes! ;-)

Until the next bake-off friends!

Julia Child and her Perfect Chocolate Mousse

"People who love to eat are always the best people." - Julia Child

I have mad love for Julia Child. I love her story (thanks Julia & Julia!), her cookbooks, her cooking shows, her attitude and lastly, her witty sense of humor.

Julia's story of how she came to be a cultural phenomenon is unreal. Here is my very condensed synopsis of it. In her mid-thirties, after moving to Paris, she dove head first into French cooking, knowing nothing about cooking. "I was 32 when I started cooking; up until then, I just ate." She not only mastered it, but she published a <hugely famous> two-part cookbook and became a television icon. Way to conquer your thirties and then some JC. #feelingsuddenlyinadequate

She had the perfect attitude about cooking- if you flub a recipe, do your best to fix it, but if that's not possible, serve your food with a huge smile because there's nothing you can do about it at that point, and that's totally OK. She wanted people to know that mistakes happen, even to the best of us. "One of the secrets, and pleasures, of cooking is to learn to correct something if it goes awry; and one of the lessons is to grin and bear it if it cannot be fixed.”

A few other things I personally enjoyed about Julia was that she always had a glass of wine with her while she cooked (I fully support that idea) and...homegirl was TALL. A fellow amazon like me! #tallgirlbond She even brilliantly modified her kitchen by raising up the counter tops so she could cook more comfortably. "Being tall is an advantage, especially in business. People will always remember you. And if you're in a crowd, you'll always have some clean air to breathe."

As an ode to Julia, I decided to make her Perfect Chocolate Mousse. I insisted on making it the way she would have made it- without using any electric appliances. That's right, I only used my brute strength. I've gotta admit, I wasn't aware of how much whisking I was getting myself into. This recipe involves several rounds of vigorous whipping. SEVERAL I broke out into a sweat early on and even had to take a few stretching breaks. When the mousse was completed, I felt like a champion...and really bedraggled. I now have even more respect for Julia and anyone who attempts this recipe sans machinery.

This mousse is quite lovely. It's rich and airy with a hint of espresso nestled into the chocolate. As Julia would say, Bon Appétit!

Julia Child’s Perfect Chocolate Mousse
Yield: Six to eight servings
Adapted from Mastering the Art of French Cooking (Knopf) by Julia Child

Ingredients
6 ounces (170g) bittersweet or semisweet chocolate, chopped (I used Green and Black’s organic 72% chocolate)
6 ounces (170g) unsalted butter, cut into small pieces
1/4 cup (60ml) dark-brewed coffee
4 large eggs, separated
2/3 cup (170g), plus 1 tablespoon sugar
2 tablespoons (30ml) dark rum
1 tablespoon (15ml) water
pinch of salt
1/2 teaspoon vanilla extract

Directions
1.  Heat a saucepan one-third full with hot water, and in a bowl set on top, melt together the chocolate, butter and coffee, stirring over the barely simmering water, until smooth. Remove from heat.
2.  Fill a large bowl with ice water and set aside.
3.  In a bowl large enough to nest securely on the saucepan of simmering water, whisk the yolks of the eggs with the 2/3 cup of sugar, rum, and water for about 3 minutes until the mixture is thick, like runny mayonnaise. (If you feel like cheating, you can also use a handheld electric mixer).
3.  Remove from heat and place the bowl of whipped egg yolks within the bowl of ice water and beat until cool and thick. (Pro Tip: Use more ice than water. I didn't and was afraid the water was going to splash into my situation the whole time). Then fold the chocolate mixture into the egg yolks.
4.  In a separate bowl, beat the egg whites with the salt until frothy. Continue to beat until they start to hold their shape. Whip in the tablespoon of sugar and continue to beat until thick and shiny, but not completely stiff, then the vanilla.
5.  Fold one-third of the beaten egg whites into the chocolate mixture, then fold in the remainder of the whites just until incorporated, but don’t overdo it or the mousse will lose volume.
6.  Transfer the mousse to a serving bowl or divide into serving dishes, and refrigerate for at least 4 hours, until firm. (Can be refrigerated for up to 4 days.)
7.  Serve as is or with a small dollop of whipped cream

Julia in her tall kitchen  –  Photo cred: vanityfair.com

I look forward to making more of JC's recipes. Until then, I'll leave you with my two of my favorite quotes of hers. The first, because it's inspiring to me and the second, because it's just plain funny.

"Learn how to cook – try new recipes, learn from your mistakes, be fearless and above all have fun."

"I always give my bird a generous butter massage before I put it in the oven. Why? Because I think the chicken likes it – and, more important, I like to give it."

Recipe: Lemon Ricotta Cookies & Lemon Crinkle Cookies

A glorious thing happened this past weekend. After 3 years of living in my current home, I finally met my next door neighbors who own the house and gorgeous garden our place looks out to (with sadly, no access!) Our building doesn't have any outdoor space (¡qué lástima!) so we could only appreciate this beaut from afar...until a few days ago. Read on.

In my experience of living in SF, you typically don't meet your neighbors...at all. It certainly doesn't happen naturally like most of us were accustomed to growing up in the burbs. Even if you passed them on the street, you wouldn't know them from Joe Schmo. The other day, while I was kickin' it outside my building trying to decide on house paint colors (TMI), this lovely couple came up to me and introduced themselves as my next door neighbors– the ones with the backyard garden. "YES. The day has finally come," I thought. After our meet and greet, which involved a lot of garden raving on my end, we exchanged info AND they invited me over for "a tour of the garden, from the other side" for the following day. EEK. That next evening, my <new favorite> neighbors had me over and took me on this heavily anticipated garden tour. Guys, this garden was even more glorious in person. As we walked though the yard, they kindly offered me lemons from their lemon tree along with a few other items. They also generously invited me to come back anytime if I ever needed anything else. On my walk back to my apartment with an extra bounce in my step, I had Ice Cube's "Today Was A Good Day" playing in my head.

With these neighborly lemons, I made two different kinds of lemon cookies: Lemon Ricotta Cookies and Lemon Crinkle Cookies. The Lemon Ricotta Cookie recipe comes from my blogger-buddy Jamie's fabulous blog and the Lemon Crinkle Cookie recipe comes from another blogger who's cookie won in a cookie-off.

Lemon Ricotta Cookies
Recipe from JforJamie.com
Yield: Makes about 30 cookies

Ingredients – Cookies
2 1/2 cups all-purpose flour
1 teaspoon baking powder
1 teaspoon salt
1 stick unsalted butter – softened
2 cups sugar
2 eggs
1 15oz container whole milk ricotta cheese
3 tablespoons lemon juice – I use the juice of 1 whole lemon
1 lemon, zested

Ingredients – Glaze
1 1/2 cups powdered sugar
3 tablespoons lemon juice or juice of 1 lemon (Pro Tip: if you use the juice of 1 lemon, up the amount of powdered sugar for a better ratio and glaze consistency)
1 lemon, zested

Directions
1.  Preheat the oven to 375°. Combine the butter and sugar in a bowl and use an electric mixer to beat until it’s light and fluffy. Add the eggs, 1 at a time, beat until incorporated. Add the wet ingredients – ricotta cheese, lemon juice and lemon zest. Beat to combine. Stir in the dry ingredients.
2.  Line baking sheets with parchment paper, use an ice cream scooper (or about 2 tablespoons) to spoon the dough on the baking sheets. Bake for 15 minutes, edges should be slightly golden. Let the cookies cool for about 15 minutes.
3.  Combine the powdered sugar, lemon juice and lemon zest in a bowl. Give it a good stir until it’s smooth and creamy. Put a spoonful on the top of each cooled cookie, spread it around the whole cookie with the back of the spoon. Let the glaze harden (about 2 hours or overnight). Keep the cookies in an air-tight container.

Lemon Crinkle Cookies
Recipe from laurenslatest.com
Yield: Makes 2 dozen

Ingredients
½ cups butter, softened
1 cup granulated sugar
½ teaspoons vanilla extract
1 whole egg
1 teaspoon lemon zest
1 Tablespoon fresh lemon juice
¼ teaspoons salt
¼ teaspoons baking powder
⅛ teaspoons baking soda
1-½ cup all-purpose flour
½ cups powdered sugar

Directions
1.  Preheat oven to 350 degrees. Grease light colored baking sheets* or line with parchment paper and set aside.
2.  In a large bowl, cream butter and sugar together until light and fluffy. Whip in vanilla, egg, lemon zest, and juice. Scrape sides and mix again. Stir in all dry ingredients slowly until just combined, excluding the powdered sugar. Scrape sides of bowl and mix again briefly.
3.  Pour powdered sugar onto a large plate. Roll a heaping teaspoon of dough into a ball and roll in powdered sugar. Place on baking sheet and repeat with remaining dough.
4.  Bake for 9-11 minutes or until bottoms begin to barely brown and cookies look matte {not melty or shiny}. Remove from oven and cool cookies about 3 minutes before transferring to cooling rack.

*If using a non-stick darker baking tray, reduce baking time by about 2 minutes.

Garden loot and our view into our neighbor's garden

Recipe: Magnolia Bakery's Banana Pudding with Salted Caramel

I've never made a banana dessert before, not counting breads and muffins of course. I'm typically drawn to chocolate anything before fruity numbers. Side-note: lets be clear friends, breads and muffins are snacks, most definitely not desserts. The only exception is a chocolate chocolate muffin, i.e. Costco's GIANT Double Chocolate Chip Muffins. 12 pack. Buy it and thank me later.

I digress. A few years ago, I went to NYC's famous Magnolia Bakery to sample their cupcakes. Apparently, I should have gotten their banana pudding too- people go cray for it. Since I won't be back to Mag's bakery anytime soon and banana's peak season is now (who knew?), I gave their recipe a go. It comes from their new cookbook, but I used the same recipe from this lovely blog, which has ridiculously delicious looking pictures of the dessert. Also, home girl took it up a notch by adding a salted caramel topper <fist-bump> which pairs perfectly with the pudding. Well played.

Aren't these (Bonne Maman) jars just so darn cute? Props to my coworker for giving me the idea of using these for desserts (and cocktails)!

Few things to note:
1.  PLAN AHEAD when you're going to make this! It's a really straight-forward recipe, mostly fast except for the portions when you have to let it sit in the fridge for several hours. The easiest solution for me was to make the caramel and first part of the pudding recipe the night before, plop it in the fridge and finish it up in the AM, planning the serve it that evening.
2.  The caramel does not need to be refrigerated - it thickens at room temperature.
3.  This caramel recipe will make much more than you need for the pudding... but you will not be upset about it. Trust me, you'll find use for it.

Va bene? Va bene.

Awaiting a salted caramel bath...

Magnolia Bakery's Banana Pudding with Salted Caramel
Recipe from The Complete Magnolia Bakery Cookbook & ringfingertanline.com

Ingredients – Pudding
1 (14-ounce) can sweetened condensed milk
1½ cups cold water
1 (3.4-ounce) package instant vanilla pudding mix
3 cups heavy cream
1 (12-ounce) box Nabisco Nilla Wafers
4 cups sliced ripe bananas

Ingredients – Caramel
1 1/2 cups sugar
1/3 cup water
1 1/4 cups heavy cream, warmed
3 tsp fleur de sel (Pro Tip: I only used 2 tsp which was plenty salty)

Directions – Pudding
1.  In a medium-sized bowl, beat sweetened condensed milk and water for about a minute. Add the pudding mix and beat for about two more minutes.
2.  Transfer to a smaller bowl, cover, and refrigerate for at least 4 hours or overnight.
3.  In a large bowl on medium speed, whip the heavy cream until stiff peaks form. Using a rubber spatula, gently fold in the pudding mixture until combined.
4.  In a large bowl, layer wafers, bananas, and pudding. (Pro Tip: I started off with a small scoop of the pudding at the bottom.) Cover tightly with plastic wrap and refrigerate for about 8 hours before serving.

Directions – Caramel
1.  Combine the sugar and 1/3 cup water in a medium heavy-bottomed saucepan. This is the only time you can stir the sugar. If you stir it while it's cooking, it turns to rock candy. Place the saucepan over medium to low heat until the sugars start to dissolve, 5 to 10 minutes. Then turn the heat up to medium-high and cook until the sugar starts to caramelize, 5 to 7 minutes (Pro Tip: this took me more like 9 mins). Do not stir while this is happening. You've got to watch the pot, because it goes from caramel to burnt really quickly. And be careful, the mixture is extremely hot!
2.  Turn off the heat and stand back to avoid splattering. Slowly add the cream. Don't panic - the cream will bubble violently, and the caramel will solidify. Just give it more time to liquefy again-trust me!
3.  Simmer over medium-low heat, stirring constantly, until the caramel dissolves and the sauce is smooth, about 2 minutes. Pro Tip: if your caramel is too liquidity (mine was 5/6 times I've made this), simmer over medium-low heat for 5-10 minutes. It's not a bad idea to do this regardless for 5 mins, just to be safe.
4.  Allow the sauce to cool to room temperature, at least 4 hours. It will thicken as it sits. Stir in salt. Pro Tip: I transferred mine to a container after 2 hrs, it was cool enough.

Salted Caramel, you had my at hello.

Recipe: Butterscotch Crème Brûlée

I have a hard time figuring out what to bake sometimes. There's just SO. MUCH. OUT there. Love the internet, but damn, the oodles and oodles of recipes can be overwhelming. How does one even choose? For me, I'm a very visual person so often times it's the photographs that draw me into a recipe (pretty colors! shiny lights!), sometimes it's the sheer number of good reviews it gets (4,500 five star reviews? Ok!) and other times it's simply the name of the recipe ("Peanut Butter Double Chocolate Dream In Your Face"). My process goes something like this. Once I figure out the specific dessert I want to make, I usually put in a good amount of research before deciding on the recipe. Maybe I'll find a handful via Pinterest or maybe it's just from random online research. After that, the hemming and hawing process beings. Even after all the research, the recipe could suck, or I screw up the execution of it. Poopie. I'm definitely my hardest critic, but I've learned that it's not the end of the world if I bomb a recipe. It's only dessert! I'm not saving lives here!

When I heard my dad wanted me to make butterscotch créme brûlée for his birthday, I forgoed my usual process and literally went with the first recipe listing I found on the web, and called it a day. Sometimes, a girl gets lazy. Lucky for me, it turned out pretty good. Plus, I got to use a blow-torch for the first time which was awesome.

Butterscotch Crème Brûlée
Recipe from Chef Jamie
Yield: 8 servings, 6-ounce ramekins.

Ingredients
1 cup whole milk
4 cups heavy cream
1/4 cup granulated sugar, plus more for caramelizing
12 large egg yolks
1 cup brown sugar

Directions
1.  Place eight 6-ounce ramekins or custard cups in the bottom of a deep roasting pan. Combine the milk and cream in a medium saucepan and bring to a boil. Turn off the heat and cover to keep warm.
2.  Place the 1/4 cup of granulated sugar in a large heavy-bottomed saucepan. Heat over medium heat while stirring with a wooden spoon. The sugar will begin to melt and lump. Continue stirring until the sugar starts to turn golden. Chop up large lumps of sugar into smaller pieces with the end of the spoon. They will dissolve as the sugar caramelizes. Stir until the caramel is a deep gold/brown color. If there are still a few lumps it is of no concern, they will be removed when the custard is strained.
3.  When the sugar is golden brown in color remove the pan from the heat. Slowly pour in the cream and milk, a few tablespoons at a time at first, while stirring constantly to keep the sugar from seizing up and turning into hard ribbons. Note: Use caution when you pour the cream-milk mixture into the sugar. Do not place your face directly over the pan and be conscious of where your hands are. The steam rising form the pan can cause a serious burn. After the cream mixture has been added place the pan back on the heat and stir until the sugar has dissolved and the mixture is smooth and caramel in color. Turn off the heat and cover the pan. Place the oven rack on the lowest rung. Preheat the oven to 350°F. Whisk the yolks and brown sugar together lightly. Bring the cream mixture back to a boil. Pour it in thirds over the eggs while whisking constantly. Strain and skim off the air bubbles from the surface of the custard.
4.  Pour the brulee into your cups or ramekins to fill 1/4-inch below the rim. Pour enough hot, not boiling water, into the roasting pan to come up three-quarters up the sides of the ramekins. Bake the custards in the preheated oven on the low oven rack, covered with a piece of parchment paper until set, 30 to 40 minutes. To test to see if the custard are done, jiggle one gently with your hand. They are done if the custard is set in all but the very center, a circle about the size of a dime. Pro Tip: Same jiggle test I used for my Pots de Creme recipe. Carefully remove the ramekins from the water bath. Cool the custards before placing in the refrigerator, uncovered, until they are completely cold. Then cover tightly with plastic until ready to serve.
5.  To caramelize the brulees, sprinkle the top of each with 1 tablespoon of granulated or superfine sugar. Roll and tap the ramekin to spread the sugar evenly on the surface of the custard. Use a blowtorch or a broiler to brulee the sugar just until it has melted and turned golden. Be careful not to curdle the custards when using a broiler. (See blow torch tips below).

Blow torches are a crowd pleaser

Blow Torch Pro Tips:
•As you torch, move in circle motions. It doesn't have to be fast movements, just don't hold it in one spot for awhile or else you'll burn the sugar.
•Your flame should be a few inches away from the brûlée. I cranked mine to high and as the gas ran out, I moved in closer to the brûlée.
•After 10 seconds or so, you should start to see the sugar melt and form bubbles.
•When are you done torching? When the sugar is melted and the majority of it is a nice golden color.

An Insider's Tip: The Perfect Cupcakes and Muffins

I appreciate useful shortcuts of any kind in life. Cliff Notes, for example, were a godsend in high school (sorry Shakespeare, you got Cliffed). Also, keyboard shortcuts, they're so money, ammi right designer friends? <nerdy laugh>

Here's a great baking "shortcut" that I got from my friend's mom years ago that I love and use whenever I'm working with a regular sized muffin/cupcake pan. The process of scooping the batter into the pan tends to be a pokey, messy process. My least favorite part is trying to proportion out each cup equally. "That one is near over-flowing, oops...and that one looks low so lets add an extra spoonful....blah." It's a bit annoying. Here's your solution: snag a 1/4 measuring cup, scoop fully with the batter and pour into cup. It's the perfect amount (2/3 full) every time. BAM.

Now go put that 1/4 cup to good use and make some cupcakes this weekend!

Recipe: Cocoa Brownies for a Brownieholic

My very desserty friend just got matched for residency. Hugely exciting, so to show my congratulations, I made him one of his most favorite desserts: brownies. As I mentioned in my Chocolate Chip Cookie Hunt post, he's actually eaten a WHOLE pan of brownies in the middle of the night because he couldn't resist...or stop himself once he started. I mean...who DOES that? Brownieholics, that's who. The first step is admitting you have a problem, buddy. Just sayin'.

Can we take a hot minute to appreciate the adorable plate I got for my Birthday? It's like a little me, but cuter and Frencher.

I found this quick n' easy recipe on Smitten Kitchen, and may I just say, that chick is a shark in the kitchen!

Best Cocoa Brownies
Recipe from Alice Medrich’s Bittersweet
Yield: Makes 16 larger or 25 smaller brownies

Ingredients
10 tablespoons (140 grams) unsalted butter
1 1/4 cups (250 grams) sugar
3/4 cup plus 2 tablespoons (65 grams, though some brands may weigh more) unsweetened cocoa powder (natural or Dutch-process)
1/4 teaspoon salt (or a heaping 1/4 teaspoon flaky salt)
1/2 teaspoon pure vanilla extract
2 large eggs, cold
1/2 cup (65 grams) all-purpose flour
2/3 cup (75 grams) walnut or pecan pieces (optional...skipped this because I like my brownies sans nuts)
2/3 cup chocolate chunks or chips (optional, but I love brownies with bonus choco pieces inside so I definitely did this)

Directions
1.  Position a rack in the lower third of the oven and preheat the oven to 325°F. Line the bottom and sides of an 8×8-inch square baking pan with parchment paper or foil.
2.  Combine the butter, sugar, cocoa, and salt in a medium heatproof bowl and set the bowl in a wide skillet of barely simmering water. Stir from time to time until the butter is melted and the mixture is smooth and hot enough that you want to remove your finger fairly quickly after dipping it in to test. Remove the bowl from the skillet and set aside briefly until the mixture is only warm, not hot. It looks fairly gritty at this point, but don’t fret — it smooths out once the eggs and flour are added. Pro Tip: I made this really easy by nuking it in the microwave for 20 seconds (or until butter is mostly melted), stirred, back in for 30 secs, stirred, back in for 30 or so, until it's hot.
3.  Stir in the vanilla with a wooden spoon. Add the eggs one at a time, stirring vigorously after each one. When the batter looks thick, shiny, and well blended, add the flour and stir until you cannot see it any longer, then beat vigorously for 40 strokes with the wooden spoon or a rubber spatula. Stir in the nuts, if using. Spread evenly in the lined pan.
4.  Bake until a toothpick plunged into the center emerges slightly moist with batter, 20 to 25 minutes is Medrich’s suggestion mine took at least 10 minutes longer to get them set. Let cool completely on a rack. Pro Tip: If you're antsy-pantsy, toss the pan in the fridge or freezer for a while to speed things up.
5.  Lift up the ends of the parchment or foil liner, and transfer the brownies to a cutting board. Cut into 16 or 25 squares.

Have a glass of milk handy, because you're going to need it.

Recipe: Peanut Butter Nutella Swirl Cookies

Nutella is officially my favorite condiment, but peanut butter takes a close second. When I found this recipe, I couldn't not make it (was that a double negative? Shrugs). I mean, why wouldn't I pair my two <condiment> loves together and win at life? This is my second time making these and they are a synch to make. They come out soft and chewy and you may eat 5 before you even know what's happening.

Peanut Butter Nutella Swirl Cookies
Recipe from Sweet Tooth
Yield: 40-45 cookies

Ingredients
1/2 cup unsalted butter, at room temperature
3/4 cup smooth peanut butter (my PB of choice when baking)
1/2 cup granulated sugar
1/2 cup packed light brown sugar
1 egg
1/2 tsp vanilla extract
3/4 tsp baking soda
1/4 tsp salt
1-3/4 cups all purpose flour
1/4 cup Nutella (plus 1 tablespoon to sample...quality control people)

Directions
1.  Preheat oven to 350 degrees.
2.  In a medium bowl, beat together butter, peanut butter, and sugars until light and fluffy, about 2-3 minutes.
3.  Add in the egg and vanilla and beat until well combined.
4.  In a separate bowl, whisk together flour, baking soda, and salt. With mixer on low, slowly incorporate the dry ingredients into the butter mixture until just combined.
5.  Microwave Nutella for 20 seconds and then drizzle over the dough. Fold in Nutella with a spatula until well-distributed throughout the dough.
6.  Chill the dough in the fridge for 15 minutes and then roll small balls by hand.
7.  Place about an inch apart on a parchment paper-lined cookie sheet and use a fork to press down the balls slightly. Pro Tip: My ball layout was 6 balls x 4 balls...and that's the first and probably last time I'll ever say "ball layout" in my life.
7.  Bake until the edges are lightly browned, about 8-10 minutes. Pro Tip: Mine took 6.5 mins, 8 mins+ made them too dry, but it really depends on your ball size <insert joke here>.
9.  Allow cookies to cool on the pan for 2 minutes, and then transfer to a cooling rack to cool completely.

Nutella-marbled

Forked

Ready to be consumed in 3, 2, 1...

Recipe: Birthday Vanilla Buttermilk Cake with Instant Fudge Frosting

A few weekends ago, a good friend of mine turned the big 3-0, so a Birthday Cake was in order. She requested a classic: yellow cake with chocolate frosting. I debated between a few recipes, but ended up going with this one because the frosting sounded divine, and easy as sin (the directions: throw all ingredients into a food processor and blend. Done).

So I ran into a few snafus while making this cake, to put it lightly.

First snafu: I overcooked the two layers slightly. Which lead to a game-time decision: should I make two new layers, stick with the two sub-par layers, OR...get crazy and make a four layer cake?! The last option was just too tempting, so I went for it, balls out. Pro Tip for next time: Bake a few mins below the recommended time to avoid over-cooking.

Second snafu: the cake layers weren't flat, even though I bought these damn things. After I stacked and frosted the layers, my cake looked like the leaning tower of fail. Sigh. Pro Tips for next time: 1. Drop cake pan(s) several times a few inches above countertop to even out batter and get rid of bubbles. 2. Use cake strips again, but soak them really well in water before applying to pan. 3. Rotate pans halfway through bake time.

Last and certainly not least snafu: the cake decided to play a fun game of slip 'n slide on the cab ride over to the party. Fricken frackin! What used to be "the leaning tower cake," was now "Jenga cake." Once I arrived to the party, I quickly greeted the birthday girl and scrambled to the bathroom to try to take care of my little "situation." With the help of a friend, we slid the cake back into place, touched up the frosting and it became a passable cake again. Luckily, the cake tasted tasty and that's all that matters....right guys? And the frosting...it was so yum, I wanted to take a bath in it. Pro Tip for next time: Let frosting harden by sitting for a few hours before transport (overnight is best) to avoid cake-sliding.

As my mom would say, "this was a good learning experience." My biggest regret is that I didn't snap a friendly pic of my Jenga cake. Que lastima!

Vanilla Buttermilk Cake with Instant Fudge Frosting
Recipe from Sweetapolita
Yield: One 3-layer, 8-inch round cake or one-2-layer. 9-inch round cake

Ingredients – Cake
4 whole eggs, room temperature
2 egg yolks, room temperature
1-1/4 cups (297 ml) buttermilk, room temperature
2 teaspoons (10 ml) pure vanilla extract
3 cups (360 g) cake flour, sifted
2 cups (400 g) sugar
1 tablespoon plus 1/2 teaspoon (17 g) baking powder
1/2 teaspoon (4 g) salt
1 cup (2 sticks) (227 g) unsalted butter, at room temperature

Ingredients – Frosting
Yield: Makes about 5 cups
6 ounces unsweetened chocolate, melted and cooled
4 1/2 cups confectioners’ sugar (no need to sift)
3 sticks (12 ounces) unsalted butter, at room temperature
6 tablespoons half-and-half or whole milk
1 tablespoon vanilla extract

Directions – Cake
1.  Preheat the oven to 350° F. Butter the bottoms and sides of cake pans, line bottoms with parchment round, butter the rounds and dust with flour.
2.  Put the eggs and yolks in a medium mixing mixing bowl, add 1/4 cup of the buttermilk and the vanilla. Whisk to blend well.
3.  Combine the flour, sugar, baking powder and salt in a large mixer bowl; whisk to blend. Add the butter and the remaining 1 cup buttermilk to these dry ingredients and with the mixer on low, blend together. Raise the mixer speed to medium and beat until light and fluffy, about 2 minutes.
4.  Add the egg mixture in 3 additions, scraping down the side of the bowl and mixing only until thoroughly incorporated.
5.  Divide batter evenly among the prepared pan (if you own one, use a kitchen scale to ensure 3 even layers). Bake the cake layers for 28-32 minutes, or until a cake tester or wooden toothpick inserted into the center comes out clean and the cake begins to pull away from the sides of the pan. Let the layers cool in the pans for 10 minutes, then carefully turn out onto wire racks, peel of the paper liners, and let cool completely.

Directions – Frosting
Place all of the ingredients in a food processor and pulse to incorporate, then process until the frosting is smooth.

Baking at Altitude

My baking ego took a few blows this weekend. I'm OK guys, don't worry. I'm confident I know why it happened and who the culprit was to blame. His name is altitude and he's a real a-hole. A group of friends and I were spending the weekend in Tahoe and all I wanted to do was satisfy them with a few tasty treats, but altitude had another thing coming: failure. Am I being too hard on altitude? Perhaps. Or perhaps he's 99.9% to blame.

So yes, apparently baking is a bit challenging when you're six-thousand feet up. I knew this, but thought it only really affected the baking time and temperature. Nope. Couldn't have been more wrong. After bombing two of my desserts that a few of my friends choked down as a courtesy, I had to redeem myself before I gave this blog a bad name (too late). I did some research the next morning on baking at altitude and found an abundance of confusing, frustrating information. Every kind of item you bake, whether it be cookies, cakes, bars, pies, etc. have different "rules" and suggestions. For example, if you're making cookies, one source says you need to:

• Decrease butter or shortening (2 Tbsp to 1/4 cup) if cookies spread too much
• Decrease sugar slightly if cookies spread too much (amount depends on size of batch and other ingredients)
• Increase liquid by 1 to 2 Tbsp only if dough is too dry and cookies don’t spread
• Increase flour (starting with 1 or 2 Tbsp) if cookies spread too much
• Increase bake time by 1 to 3 minutes
• Decrease bake time by 1 to 2 minutes

Huh??

My studies concluded to this: baking in altitude is a complete crap shoot and you need to set aside a day for trail and error. I unfortunately didn't have the patience for this nonsense, nor did I have the time. I had to nail my next dessert on the first try.

Enter food blogger: Katie Goodman of Good Life Eats who lives at altitude. This dear has already done the hard part for me. Katie, thank you for saving my dignity and the tiniest (non-existent) reputation that I had. I made her Vanilla Bean Sour Cream Cupcakes with Vanilla Bean Buttercream Frosting and luckily, they didn't suck.

Vanilla on Vanilla

Vanilla Bean Sour Cream Cupcakes with Vanilla Bean Buttercream Frosting
Recipe from Good Life Eats
Yield: 18-20 cupcakes

Ingredients – Cupcakes
1 1/4 cup all purpose flour
1 cup cake flour
1 teaspoon baking powder
1/2 teaspoon baking soda
1/2 teaspoon kosher salt
1 stick (8 tablespoons) unsalted butter, at room temperature
1 1/3 cups sugar
1 cup sour cream
1/2 cup milk
4 large egg whites, room temperature
seeds scraped from one vanilla bean
2 teaspoons pure vanilla extract

Ingredients – Frosting
Side-note: this makes a ton frosting so don't be shy with it
3 sticks unsalted butter, softened
seeds scraped from one vanilla bean
2 teaspoons clear vanilla extract (to maintain the bright white color)
1 ½ pounds (24 ounces) confectioners’ sugar, sifted
4-6 tablespoons heavy cream or milk

Directions – Cupcakes
1.  Preheat the oven to 375 degrees F. Place the racks in the center position. Line cupcake tins with cupcake liners. Set aside.
2.  In a large bowl combine both flours, baking powder, baking soda, and salt. Whisk to combine.
3.  In a medium bowl whisk together the milk, sour cream, and egg whites. Set aside.
4.  Fit a stand mixer with a paddle attachment, or use a hand mixer. Add the butter, sugar and vanilla to the bowl and beat at medium speed for 3 minutes, or until light. Scrape the sides as necessary.
5.  Add the vanilla extract and one third of the flour mixture while beating on medium speed, again scraping the sides as needed. Beat in half of the sour cream mixture. Alternately add the remaining flour mixture and sour cream until all the wet and dry ingredients have added, beating until the batter fully incorporated and smooth.
6.  Use a large scoop (about 3 tablespoons), evenly divide the batter between 18 lined muffin tins filling each about 2/3 of the way full.
7.  Bake for 15-24 minutes (Pro Tip: Mine took 13 mins), or until a toothpick inserted into the centers come out clean. Cool on wire rack.

Directions – Frosting
1.  In the bowl of a stand mixer fitted with the whisk attachment, combine the butter and vanilla bean seeds. Beat until fluffy. Turn the mixer to low speed and slowly add the confectioners' sugar while continuing to beat.
2.  Once well blended, add in the vanilla and 4 tablespoons heavy cream or milk. Mix on low speed until well combined and moist. If desired, an additional 1 to 2 tablespoons of heavy cream or milk until your desired consistency is reached. Beat at high speed until frosting is smooth and fluffy.

And that my friends, is why it royally blows to bake at altitude. For those of you who want to try it, I recommend "cheating" and finding a recipe that has already been tested successfully. If not, I hope whoever you're feeding enjoys piss-poor desserts. : )

Recipe: Romantical Chocolate Hazelnut Pots De Creme

My first Valentine's Day with my boyfriend (now hubs) was slightly dreadful. Not the company of course <shifty eyes>, but it was the whole Valentine's Day experience. We had reservations at a French restaurant and when we waltzed in, we noticed that the place was chalk full of couples...wearing pink and red...and we were one of them. We were living in a cliché and frankly, I was kinda grossed out. We were squeezed into a table, side-by-side with the couple sitting next to us, and served a below average, rushed meal. We couldn't wait to get outta there. Never, never again, we told ourselves. Since then, we've done much better usually staying in for the night, avoiding pink and red in our faces.

Remember Valentine's Day back in elementary school? It was definitely more acceptable to be clichéy...and there was more candy and crafts too. We had to give everyone in class a Valentine card and it was a delicate process figuring out which Valentine/candy hearts went to whom. You never want to give someone the wrong impression with a too forward candy heart ya know.

For this Valentine's Day, the husband is out of town for work, but I'm luckily spending it with my girlfriends. I've made us Chocolate Hazelnut Pots de Creme by the domestic goddess Martha Stewart, mostly because I'm obsessed with choco hazelnut right now and I've never made pot de creme. It should pair nicely with the RomCom I've picked out too.

Chocolate Hazelnut Pots de Creme
Recipe from Martha Stewart
Yield: Makes 4 Servings

Ingredients
1 1/4 cups half-and-half
3 ounces bittersweet chocolate, finely chopped
1/4 cup sugar
3 large egg yolks
1/2 teaspoon pure vanilla extract
1 tablespoon unsweetened cocoa powder
Pinch of salt
1 tablespoon hazelnut-flavored liqueur, such as Frangelico
Whipped cream, for serving

Directions
1.  Preheat oven to 300 degrees. Bring half-and-half just to a simmer in a small saucepan. Remove from heat; add chocolate and sugar. Let stand 5 minutes.
2.  In a large bowl, stir together yolks, vanilla, cocoa, salt, and liqueur if desired. With a fork, stir chocolate mixture until smooth, then gradually stir into yolk mixture. Pour through a fine sieve into a glass measuring cup.
3.  Place 4 custard cups or ramekins (3 to 4 ounces each) in a shallow roasting pan, and divide chocolate mixture among them. Pour hot water into the pan so it reaches halfway up the sides of cups. Pro Tip(s): Line a towel on the bottom of the pan to keep the ramekins from sliding. Also, have a tea kettle ready with the hot water and pour in with the pan pulled out on the oven rack.
4.  Bake until custards are almost set in centers, about 30 minutes Pro Tip: How to know when it's done? Jiggle test- grab a ramekin and hit the side, if it jiggles and then stops right away, then it's done. (custards will firm as they cool). Carefully remove cups from hot-water bath; let cool slightly. Yet another Pro Tip: Use a spatula to lift the ramekins out of the pan.
5.  Cover with plastic wrap; refrigerate. Just before serving, dollop with whipped cream, if desired.

The result? I was pretty happy with how it turned out. My only disappointment was that I couldn't taste the hazelnut at all. I think I'll try to work in some finely chopped hazelnuts into it next time.

Happy Valentine's Day to you and yours!

Dessert Guilty Pleasures

Dessert guilty pleasures. We've all got 'em. Sometimes they originate from childhood, sometimes they sprout out of no where. I'm talking about that one dessert you're embarrassed to love. You may or may not feel shameful about it, but it exists and you're mostly ok with it.

What's mine? I've gotta go with ice cream cake from Baskin Robbins (or as I like to call it, Raskin Bobbins). The first time I had it was probably at one of my single digit birthday parties at the local bowling alley. I probably brattily insisted that my slice had to have the pink rose in it too. My favorite flavor is Mint Chocolate Chip Ice Cream with Chocolate Cake. Last year, my hubs got me this exact cake for my birthday and I just about died. Kept it cool on the outside of course, but was as giddy as a school-girl on the inside.

Time to out some people's DGPs (dessert guilty pleasures). Lets start with my sister's: vanilla Costco cake with vanilla frosting, more specifically, the corner piece because it has the most frosting. I admit, it's pretty tasty, if you like average cake. My other sister's is Ding Dongs. I literally just saw a pack of these on her kitchen counter yesterday. #noshame My husband's DGP is Betty Crocker's yellow cake with chocolate frosting. Not bad, but not good. My coworker's is chocolate/vanilla Costco frozen yogurt. The irony is that she doesn't have a membership but has somehow managed to get her fro-yo on. She told me she was denied only once for lack of a membership, which drove her to tears. Apparently it had been a long, bad day and all she wanted was a happy little $1.25 Costco fro-yo. Long story short, she ended up driving to the next nearest Costco, which was an hour away, and was luckily able to fulfill her hankering.

A few others I've heard: Nutella by the spoonful (ok, but who hasn't done that), Hostess Powdered Donettes (craptastic!), Nutrageous (hello 80s candy bar), and lastly a friend insisted that all dessert is a guilty pleasure <shakes head>.

Ok, now that I've shared mine, and outted several people's, what's YOUR dessert guilty pleasure? I promise not to mock you...much.

Recipe: Chocolate Guinness Cupcakes with Bailey's Buttercream Frosting

Don't ask me why, but I looked up the definition of "cupcake" and here's what I found:

cup·cake [kuhp-keyk]
noun
1. a small cake, the size of an individual portion, baked in a cup-shaped mold.
2. Older Slang
a. a sexually attractive young woman.
b. a beloved girl or woman.

Well hello definition number two. Can't remember the last time I've heard someone call a chick a "cupcake," but I think we should bring this back. Discuss amongst yourselves.

My definition would be more like this:

cup·cake [just sound it out you yammo]
noun
1. A three bite, pretty, miniature cake that tastes like happiness consumed often by a tall ginger.

I find it quite hard to say no to cupcakes. Especially these Chocolate Guinness Cupcakes with Bailey's Buttercream Frosting. I first made these for my Guinness-addicted friend's birthday a few years ago, and they were well received. I made these again for a work bake sale this week and apparently, they sold like hot cakes. The cake is super super moist and may I just say that chocolate and Bailey's just belong together. They're the loveliest of pairs.

Side Note: For transporting these beauties or other cakes/cupcakes, I use this cupcake/cake carrier. I'm kind of in love with it.

Chocolate Guinness Cupcakes with Bailey's Buttercream Frosting
Recipe from food.com & grouprecipes.com
Yield: 24-30 cupcakes

Ingredients – Cake
1 cup Guinness
1/2 cup plus 2 tablespoons butter
1/2 cup cocoa
2 cups superfine sugar
3/4 cup sour cream
2 eggs
1 tablespoon vanilla extract
2 cups all-purpose flour
2 1/2 teaspoons baking soda

Ingredients – Frosting
1/2 cup unsalted butter
1 pinch table salt
4 cups confectioners' sugar (ProTip: I used 3 cups so they weren't overly sweet)
3 tablespoons Bailey's
1 tablespoon milk

Directions – Cake
1.  Preheat oven to 350°F Grease cupcake tins, or fill with paper liners.
2.  Pour the Guinness into a large saucepan and add the sliced butter. Heat until the butter is melted and remove from the heat. Whisk in the cocoa and sugar.
3.  In a separate bowl, beat the sour cream with the eggs and vanilla.
4.  Add the sour cream mixture to the Guinness mixture in the saucepan.
5.  Beat in the flour and baking soda.
6.  Divide the batter evenly amongst the cupcake cups. Bake 19-22 minutes, or until a toothpick inserted into the center of a cake comes out mostly clean.
7.  Cool completely in the pan on a wire rack.

Directions – Frosting
1.  In a bowl of stand mixer, cream butter until very light and fluffy. On low, add salt, and slowly add confectioners sugar. Add a couple of spoonfuls at a time until it has all been absorbed into the butter.
2.  Add Bailey's and milk until spreadable consistency is achieved.

Recipe: Chunky Apple Spice Cupcakes with Cream Cheese Frosting

Fancy froster again, FTW

I was recently given the challenge to come up with a recipe for a Chunky Apple Spice Cupcake with not-so-sweet Cream Cheese Frosting. "It has to have CHUNKS of apple in it...don't forget the CHUNKS!" my dessert challenger said. After much research, I started with one of Martha's (Miss Stewart and I are on a first-name basis) recipes but added in my own flair. Sidenote: These would make a bomb.com Thanksgiving dessert too...

Chunky Apple Spice Cupcakes with Cream Cheese Frosting
Yield: 2 dozen cupcakes

Ingredients – Cupcakes
2 1/4 cups all-purpose flour

2 teaspoons baking soda
2 teaspoons ground cinnamon
1/2 teaspoon ground nutmeg
1 teaspoon salt
8 tablespoons (1 stick) unsalted butter, softened
2 cups sugar
2 large eggs
1 teaspoon vanilla extract
2 pounds Pink Lady apples, 2 cups coarsely shredded, 2 cups chopped
(bite-sized)

Ingredients – Frosting
2 (8 ounce) packages cream cheese, softened
1/2 cup butter, softened
2 cups sifted confectioners' sugar
1 teaspoon vanilla extract

Directions – Cupcakes
1.  Preheat oven to 350 degrees. Line muffin tins with paper liners; set aside. Stir together flour, baking soda, cinnamon, nutmeg, and salt in a medium bowl; set aside. Cream butter and sugar on medium-high speed in the bowl of a mixer fitted with the paddle until pale and fluffy, about 5 minutes. Mix in eggs and vanilla.
2.  Reduce speed to low; mix in apples. Add flour mixture; mix, scraping down sides of bowl as needed, until just combined.
3.  Fill lined cups halfway with batter; bake until tops are springy to the touch, 18 to 20 minutes. Remove from tins; let cool on a wire rack.
4.  When completely cool, frost cupcakes and store in fridge.

Directions – Frosting
1.  In a medium bowl, cream together the cream cheese and butter until creamy.
2.  Mix in the vanilla, then gradually stir in the confectioners' sugar. Store in the refrigerator after use.

The chopped apple gave it great texture and I'm kind of in love with the frosting. I'm definitely going to reuse the frosting recipe for a Thanksgiving cupcake I'm making tomorrow (deets on that to come next week). I'm pleased to report, my dessert-challenger was darn happy with them too. : )

Recipe: Peanut Butter Chocolate Chip Bars

"Peanut Butter Chocolate Chip Bars." These badboys are as amazing as they sound. I had to make them as soon as I discovered the recipe over a decade ago in my mom's cookbook "All-Butter Fresh Cream Sugar-Packed Baking Book" by Judy Rosenberg. Best. Cookbook title. Ever. I whipped up my first batch for Thanksgiving and my family went absolutely nuts for them. They now insist that I make them for every Thanksgiving and Christmas or else they'd disown me. Well, they never said that last part, but it's mostly likely true. My cousins don't even call them "dessert," they instead call them "appetizers" because they can't wait to eat them until dessert. I like this recipe because clearly it's a crowd pleaser in my family, but mostly because it's a quick, simple recipe. Win-win!

Peanut Butter Chocolate Chip Bars
Recipe from All-Butter Fresh Cream Sugar-Packed Baking Book
Yield: 30 bars (depends on how big you cut them)

Ingredients
1 1/3 cups plus 1 tablespoon plus 1 teaspoon all-purpose flour (these measurements sounded odd to me too, but they need to be precise)
2 teaspoons baking powder
1/8 teaspoon baking soda
1/4 teaspoon salt
8 tablespoons (1 stick) unsalted butter, at room temperature
1/2 cup commercial smooth peanut butter
1/2 cup granulated sugar
1/2 cup plus 2 tablespoons light brown sugar, lightly packed
1 teaspoon vanilla extract
2 large eggs, at room temperature
1 cup semisweet chocolate chips (I overflow my cup)

Directions
1.  Preheat over to 350. Lightly grease an 11x7-inch baking pan with butter or vegetable oil (note: I used an 8x8 for thicker bars).
2.  Sift the flour, baking powder, baking soda and salt into a medium-size mixing bowl and set aside.
3.  Using an electric mixer on medium-high speed, cream the butter, peanut butter, both sugars, and the vanilla until light and fluffy, about 1 1/2 minutes. Stop the mixer to scrape the bowl with a rubber spatula.
4.  Add the eggs one at a time and beat on medium speed until partially blended after each addition, about 10 seconds. After the last addition, beat until blended, about 30 seconds, stopping the mixer twice to scrape the bowl.
5.  Add the dry ingredients to the batter and mix with a spatula until the flour is absorbed. Then mix on low speed until blended, 7 to 10 seconds. Scrape the bowl, especially the bottom.
6.  Add the chocolate chips and blend for several seconds. Scrape the bowl. Spread the batter evenly in the prepared pan.
7.  Bake the bars on the center oven rack until the edges are deep golden and the center is lightly golden and slightly puffy, 25-30 mins (these taste much better undercooked!) The center will drop when the bars are taken out of the oven. Cut the bars into squares after they have cooled a bit on the rack.

Chewy texture, perfect ratio of peanut butter to chocolate. Enjoy!

Happy Thanksgiving Baking everyone!